FX Series Programmable Controllers
Menu Bar Function 6
6-54
DU in which data is transferred to the DU
Before starting data transfer between the DU, set the DU to the wait status in the personal computer transfer
mode (in which data transfer is enabled). (In the 25DU, the screen data transfer mode is offered instead.)
The operating procedure in each DU is described briefly below. (For the details, refer to description on the
personal computer transfer mode in the DU operation manual.) The procedure below is required to change
over the data transfer function between the DU and the personal computer and the printout function.
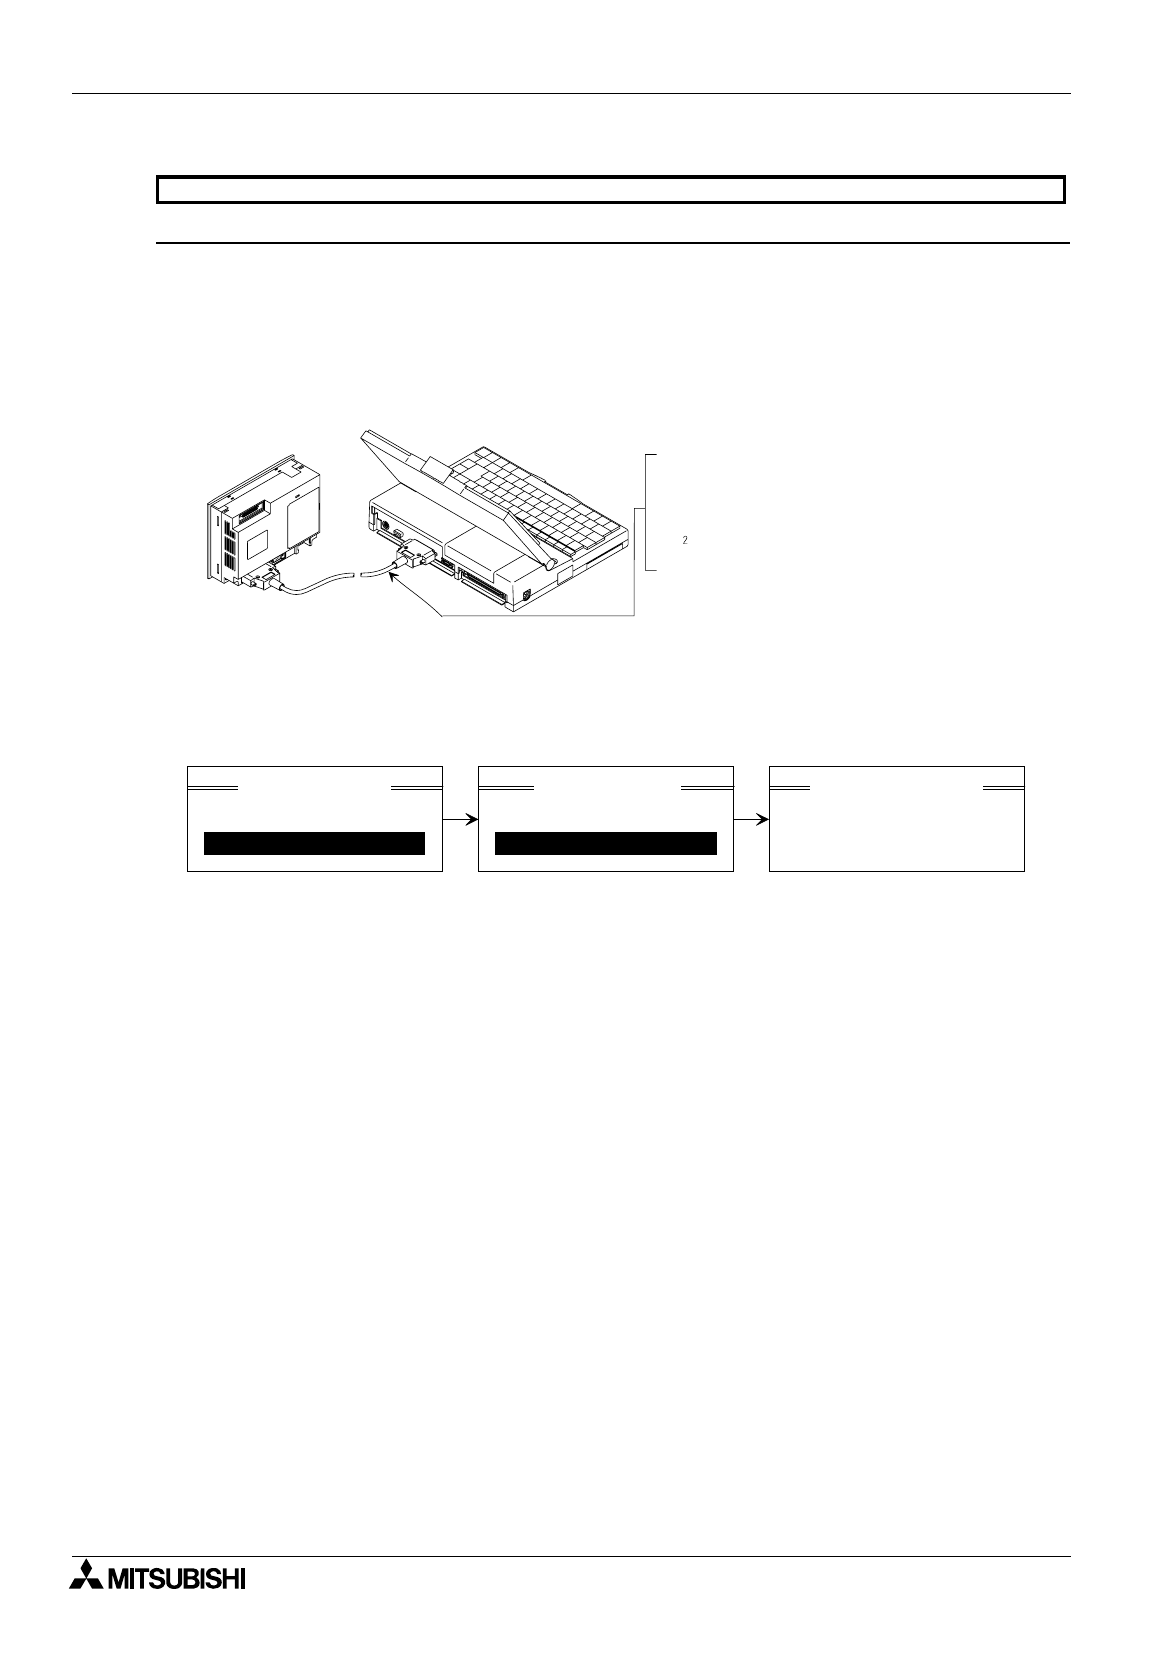
1 ) Connect the personal computer and the DU.
Connect them via the RS-232C interface.
2 ) Change over the DU to the personal computer transfer mode.
(The operating procedure varies depending on the DU.)
25DU
In the setting performed at shipment from the factory, the mode selection screen is displayed when the
power is turned on.
%
When the mode selection screen is not displayed
Turn on the power while pressing and holding the [F3] key so that the operation environment set
screen is displayed.
On this screen, the use mode is set to “Screen mode”. Select “All modes”.
25DU, 30DU,40DU, 40DU-TK and 50DU-TK
DU
Personal computer
Connect the data transfer cable to the RS-232C
connector.
F
2
-232CAB
(connector on the personal computer: 25-pin)
F
-232CAB-1
(connector on the personal computer: 9-pin)
2. ALARM MODE
3. OTHER MODE
<SELECT MODE>
1. SET CLOCK
3. DATA TRANSFER
<OTHER MODE>
FX-25DU
↔
PC
WAITING
<DATA TRANSFER>
Select "3. Other mode" using
the [F1] or [F2] key, and press
the [F5] key to execute
selection.
Select "3. Screen data" using
the [F1] or [F2] key, and press
the [F5] key to execute
selection.
“Wait for data transfer" is
displayed.


