


98 Chapter 5 Setting Up Group Accounts
Enabling a Group’s Web Services
Mac OS X Server v10.5 includes Groups, a feature that allows groups to easily create a
collaborative website. This website uses calendar, wiki, and blog technology to
streamline group communication. You can also set up a mailing list so that mail sent to
the list is sent to all group members and are archived on the group website.
You can only enable the web calendar and mailing list archive if you first enable the
wiki and blog service.
You can choose who views or edits the website:
 “Group members only” includes all members of the group
 “Some group members” (only available for editing) includes group members who are
given editing privileges
 “Authenticated users” includes anyone who can authenticate with your organization’s
directory
 “Anyone” allows everyone, without requiring authentication
You can provide different levels of website access to different subsets of users. For
example, you can set up an intranet site where everyone in your organization can view
the site (allow “Entire directory” to view services), but only group members can edit it
(allow “Group members” to edit services).
When setting up levels of website access, the users who can edit the website are a
subset of the users who can view it. For example, you can’t let anyone edit the site and
allow only group members to view it.
When you create a group, the URL of the group website and the mailing list email
address is based on the short name of the group (shortname@hostname.com). If you
change the group’s name after creating it, the URL and mailing list email address do
not change.
The administrator computer’s search policy must include the server that hosts web
services.
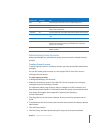
To enable a group’s web services:
1 In Workgroup Manager, click Accounts.
2 Select the group account you want to work with.
To select an account, click the globe icon, choose the directory domain where the
account resides, click the Groups button, and select the group.
3 To authenticate, click the lock and enter the name and password of a directory domain
administrator.
4 Choose a server from the “Enable the following services for this group on” pop-up
menu.