Installing the Model 1001MC RS-232 daisy-chain port cable 39
Model 1001MC Operations Guide 3 • Getting started
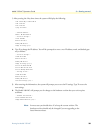
Note To RESET to factory configuration the user must type e three times
anytime during the boot sequence upon power-up. The console will
display the following messages:
Are you sure you want to erase current configuration (y/n)?y
If y is entered, the current configuration will be erased and the factory
default configuration will be restored.
Are you sure you want to erase current configuration (y/n)?n
If n is entered, the boot sequence will continue without any changes
to configuration.
7. Turn power off and on again reboot the system with the new settings. After your system reboots, log into
the box using a standard web browser from your network.
8. Disconnect the cable from the rear panel RS-232 configuration port of the 1001MC.
9. If you are installing a daisy-chain cable to the RS-232 configuration port of the 1001MC, go to section
“Installing the Model 1001MC RS-232 daisy-chain port cable”. Otherwise, go to section “Setting the
address range for your NetLink modems”.
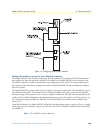
Installing the Model 1001MC RS-232 daisy-chain port cable
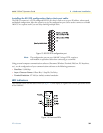
Using the Model 1001MC RS-232 Daisy Chain Port and an EIA-510 cable, your Model 1001MC can man-
age up to seven additional racks. Each daisy chained rack must have a Model 1001CC Controller Card
installed. The Model 1001MC—in combination with the Model 1001CC—can control up to 120 NetLink
rack card modems and their remote CPE devices. This section describes how to connect your Model 1001MC
to additional racks.
Note If you plan to build your own RS-232-to-EIA-561 converter to con-
nect the Model 1001MC to the Model 1001CC, refer to the Model
1001CC manual for EIA-561 interface pinouts.


