


11-13
Catalyst 2960 and 2960-S Switch Software Configuration Guide
OL-8603-09
Chapter 11 Configuring Web-Based Authentication
Configuring Web-Based Authentication
Note You need to configure some settings on the RADIUS server, including: the switch IP address, the key
string to be shared by both the server and the switch, and the downloadable ACL (DACL). For more
information, see the RADIUS server documentation.
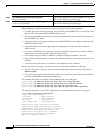
This example shows how to configure the RADIUS server parameters on a switch:
Switch(config)# ip radius source-interface Vlan80
Switch(config)# radius-server host 172.l20.39.46 test username user1
Switch(config)# radius-server key rad123
Switch(config)# radius-server dead-criteria tries 2
Configuring the HTTP Server
To use web-based authentication, you must enable the HTTP server within the switch. You can enable
the server for either HTTP or HTTPS.
You can configure custom authentication proxy web pages or specify a redirection URL for successful
login.
Note To ensure secure authentication when you enter the ip http secure-secure command, the login page is
always in HTTPS (secure HTTP) even if the user sends an HTTP request.
• Customizing the Authentication Proxy Web Pages
• Specifying a Redirection URL for Successful Login
Customizing the Authentication Proxy Web Pages
You can configure web authentication to display four substitute HTML pages to the user in place of the
switch default HTML pages during web-based authentication.
To specify the use of your custom authentication proxy web pages, first store your custom HTML files
on the switch flash memory, then perform this task in global configuration mode:
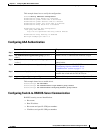
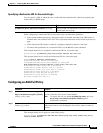
Command Purpose
Step 1
ip http server Enable the HTTP server. The web-based authentication feature uses the HTTP server
to communicate with the hosts for user authentication.
Step 2
ip http secure-server Enable HTTPS.
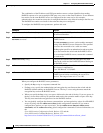
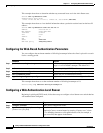
Command Purpose
Step 1
ip admission proxy http login page file
device:login-filename
Specify the location in the switch memory file system of
the custom HTML file to use in place of the default login
page. The device: is flash memory.
Step 2
ip admission proxy http success page file
device:success-filename
Specify the location of the custom HTML file to use in
place of the default login success page.