10-63
Catalyst 2960 and 2960-S Switch Software Configuration Guide
OL-8603-09
Chapter 10 Configuring IEEE 802.1x Port-Based Authentication
Configuring 802.1x Authentication
Configuring NAC Layer 2 802.1x Validation
You can configure NAC Layer 2 802.1x validation, which is also referred to as 802.1x authentication
with a RADIUS server.
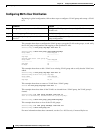
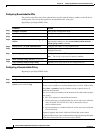
Beginning in privileged EXEC mode, follow these steps to configure NAC Layer 2 802.1x validation.
The procedure is optional.
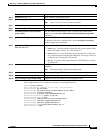
This example shows how to configure NAC Layer 2 802.1x validation:
Switch# configure terminal
Switch(config)# interface gigabitethernet2/0/1
Switch(config)# interface gigabitethernet0/1
Switch(config-if)# dot1x reauthentication
Switch(config-if)# dot1x timeout reauth-period server
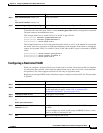
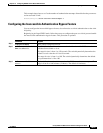
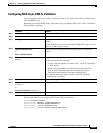
Command Purpose
Step 1
configure terminal Enter global configuration mode.
Step 2
interface interface-id Specify the port to be configured, and enter interface configuration mode.
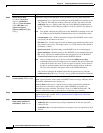
Step 3
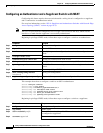
dot1x guest-vlan vlan-id Specify an active VLAN as an 802.1x guest VLAN. The range is 1
to 4094.
You can configure any active VLAN except an RSPAN VLAN, or a voice
VLAN as an 802.1x guest VLAN.
Step 4
authentication periodic
or
dot1x reauthentication
Enable periodic re-authentication of the client, which is disabled by
default.
Step 5
dot1x timeout reauth-period {seconds |
server}
Set the number of seconds between re-authentication attempts.
The keywords have these meanings:
• seconds—Sets the number of seconds from 1 to 65535. The default
is 3600 seconds.
• server—Sets the number of seconds based on the value of the
Session-Timeout RADIUS attribute (Attribute[27]) and the
Termination-Action RADIUS attribute (Attribute [29]).
This command affects the behavior of the switch only if periodic
re-authentication is enabled.
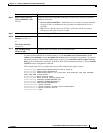
Step 6
end Return to privileged EXEC mode.
Step 7
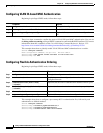
show authentication interface
interface-id
or
show dot1x interface interface-id
Verify your 802.1x authentication configuration.
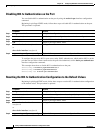
Step 8
copy running-config startup-config (Optional) Save your entries in the configuration file.


