


7-21
Catalyst 2960 and 2960-S Switch Software Configuration Guide
OL-8603-09
Chapter 7 Managing Switch Stacks
Accessing the CLI of a Specific Member
To remove provisioned information and to avoid receiving an error message, remove the specified switch
from the stack before you use the no form of this command.
This example shows how to provision a switch with a stack member number of 2 for the stack. The show
running-config command output shows the interfaces associated with the provisioned switch:
Switch(config)# switch 2 provision
Switch(config)# end
Switch# show running-config | include switch 2
!
interface GigabitEthernet2/0/1
!
interface GigabitEthernet2/0/2
!
interface GigabitEthernet2/0/3
<output truncated>
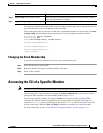
Changing the Stack Membership
If you remove powered-on members but do not want to partition the stack:
Step 1 Power off the newly created stacks.
Step 2 Reconnect them to the original stack through their stack ports.
Step 3 Power on the switches.
Accessing the CLI of a Specific Member
Note This task is only for debugging purposes, and is only available from the master.
You can access all or specific members by using the remote command {all | stack-member-number}
privileged EXEC command. The stack member number range is 1 to 4.
You can access specific members by using the session stack-member-number privileged EXEC
command. The member number is appended to the system prompt. For example, the prompt for
member 2 is
Switch-2#, and system prompt for the master is Switch#. Enter exit to return to the CLI
session on the master. Only the show and debug commands are available on a specific member.
For more information, see the “Using Interface Configuration Mode” section on page 12-15.
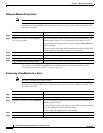
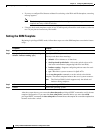
Step 6
show switch stack-member-number Verify the status of the provisioned switch. For stack-member-number,
enter the same number as in Step 2.
Step 7
copy running-config startup-config (Optional) Save your entries in the configuration file.
Command Purpose