Chapter 5 Work in Edit mode 59
Create keyboard layers and splits
Layers and splits overview
If you play a keyboard controller, you can easily create keyboard layers and splits in your
MainStage patches. You create layers and splits by adding two or more channel strips to a patch
and setting the Low Key and High Key for each channel strip to dene its key range. The key
range denes the range of notes on a keyboard controller that trigger sound from a software
instrument or external instrument in the channel strip. You can dene key ranges so that they
overlap (for layered sounds) or are contiguous (for splits).
Dene the key range
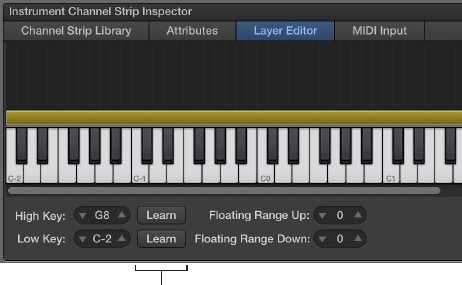
The Layer Editor tab in the Channel Strip Inspector shows the key range for each channel strip in
a patch and in the concert or set containing the patch (if either includes a channel strip with a
key range). You can dene the key range for a channel strip using the layers, the Learn buttons,
or the Low Key and High Key value sliders.
Dene a key range using the layers
1 In the Channel Strip Inspector, click the Layer Editor tab.
2 In the Layer Editor, move the pointer over the left edge of the layer you want to change
or dene.
The pointer changes to a resize pointer.
3 Drag the left edge of the layer to the note you want to use as the low key (the lowest note in the
key range).
4 Move the pointer over the right edge of the layer.
5 Drag the right edge of the layer to the note you want to use as the high key (the highest note in
the key range).
Dene a key range using the Learn buttons
1 In the Channel Strips area, select the channel strip.
2 In the Channel Strip Inspector, click the Layer Editor tab.
3 Click the Learn button next to the Low Key value slider.
Click Learn and play the
corresponding note on
your music keyboard.
4 On your keyboard controller, press the key you want to set as the lowest key in the key range.
5 To turn o Learn mode for the Low Key, click the Learn button again.
6 Click the Learn button next to the High Key value slider.
