1-16
Catalyst 2960 and 2960-S Switch Software Configuration Guide
OL-8603-09
Chapter 1 Overview
Default Settings After Initial Switch Configuration
• Time Domain Reflector (TDR) to diagnose and resolve cabling problems on 10/100 and
10/100/1000 copper Ethernet ports
• SFP module diagnostic management interface to monitor physical or operational status of an SFP
module
• Generic online diagnostics to test hardware functionality of the supervisor engine, modules, and
switch while the switch is connected to a live network(Catalyst 2960-S only).
• On-board failure logging (OBFL) to collect information about the switch and the power supplies
connected to it (Catalyst 2960-S only)
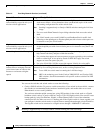
Default Settings After Initial Switch Configuration
The switch is designed for plug-and-play operation, requiring only that you assign basic IP information
to the switch and connect it to the other devices in your network. If you have specific network needs,
you can change the interface-specific and system- and stack-wide settings.
Note For information about assigning an IP address by using the browser-based Express Setup program, see
the getting started guide. For information about assigning an IP address by using the CLI-based setup
program, see the hardware installation guide.
If you do not configure the switch at all, the switch operates with these default settings:
• Default switch IP address, subnet mask, and default gateway is 0.0.0.0. For more information, see
Chapter 3, “Assigning the Switch IP Address and Default Gateway,” and Chapter 20, “Configuring
DHCP Features and IP Source Guard Features.”
• Default domain name is not configured. For more information, see Chapter 3, “Assigning the Switch
IP Address and Default Gateway.”
• DHCP client is enabled, the DHCP server is enabled (only if the device acting as a DHCP server is
configured and is enabled), and the DHCP relay agent is enabled (only if the device is acting as a
DHCP relay agent is configured and is enabled). For more information, see Chapter 3, “Assigning
the Switch IP Address and Default Gateway,” and Chapter 20, “Configuring DHCP Features and IP
Source Guard Features.”
• Switch cluster is disabled. For more information about switch clusters, see Chapter 6, “Clustering
Switches,” and the Getting Started with Cisco Network Assistant, available on Cisco.com.
• No passwords are defined. For more information, see Chapter 5, “Administering the Switch.”
• System name and prompt is Switch. For more information, see Chapter 5, “Administering the
Switch.”
• NTP is enabled. For more information, see Chapter 5, “Administering the Switch.”
• DNS is enabled. For more information, see Chapter 5, “Administering the Switch.”
• TACACS+ is disabled. For more information, see Chapter 9, “Configuring Switch-Based
Authentication.”
• RADIUS is disabled. For more information, see Chapter 9, “Configuring Switch-Based
Authentication.”
• The standard HTTP server and Secure Socket Layer (SSL) HTTPS server are both enabled. For more
information, see Chapter 9, “Configuring Switch-Based Authentication.”


