11-10
Catalyst 2960 and 2960-S Switch Software Configuration Guide
OL-8603-09
Chapter 11 Configuring Web-Based Authentication
Configuring Web-Based Authentication
• Hosts that are more than one hop away might experience traffic disruption if an STP topology
change results in the host traffic arriving on a different port. This occurs because the ARP and DHCP
updates might not be sent after a Layer 2 (STP) topology change.
• Web-based authentication does not support VLAN assignment as a downloadable-host policy.
• Web-based authentication is not supported for IPv6 traffic.
Web-Based Authentication Configuration Task List
• Configuring the Authentication Rule and Interfaces, page 11-10
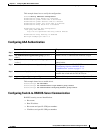
• Configuring AAA Authentication, page 11-11
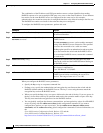
• Configuring Switch-to-RADIUS-Server Communication, page 11-11
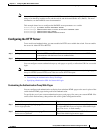
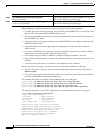
• Configuring the HTTP Server, page 11-13
• Configuring an AAA Fail Policy, page 11-15
• Configuring the Web-Based Authentication Parameters, page 11-16
• Removing Web-Based Authentication Cache Entries, page 11-17
Configuring the Authentication Rule and Interfaces
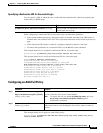
This example shows how to enable web-based authentication on Fast Ethernet port 5/1:
Switch(config)# ip admission name webauth1 proxy http
Switch(config)# interface fastethernet 5/1
Switch(config-if)# ip admission webauth1
Switch(config-if)# exit
Switch(config)# ip device tracking
Command Purpose
Step 1
ip admission name name proxy http Configure an authentication rule for web-based authorization.
Step 2
interface type slot/port Enter interface configuration mode and specifies the ingress Layer 2 or
Layer 3 interface to be enabled for web-based authentication.
type can be fastethernet, gigabit ethernet, or tengigabitethernet.
Step 3
ip access-group name Apply the default ACL.
Step 4
ip admission name Configures web-based authentication on the specified interface.
Step 5
exit Return to configuration mode.
Step 6
ip device tracking Enables the IP device tracking table.
Step 7
end Return to privileged EXEC mode.
Step 8
show ip admission configuration Display the configuration.
Step 9
copy running-config startup-config (Optional) Save your entries in the configuration file.


