


Using a Quantum 984 HSBY System
104
840 USE 106 00 January 2003
Starting Your Hot Standby System
Preconditions
Be sure...
The controller you are starting first has been fully programmed.
The function keyswitch on the CHS 110 module is in the Run position.
The designation slide switches on CHS 110 modules are in opposite positions.
The first controller to power up will automatically become the primary controller,
regardless of its designation as A or B.
Starting the
System
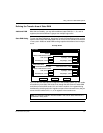
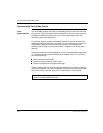
The following chart provides the appropriate steps for starting your Hot Standby
system.
Note: Start one controller at a time.
Step Action
1 Turn on power to the first backplane.
2 Download the program to the controller.
3 Start the controller in that backplane.
4 Turn on power to the second backplane.
5 Download the program to the standby controller.
If the switches on the controllers are set to the same address, you will not be able
to download the program. Use the keyswitch program update procedure.
6 Start the standby controller.
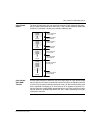
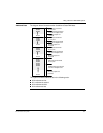
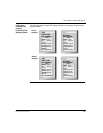
7 Check the LED display. If the system is functioning normally, the display should
match "Indicators of a Properly Functioning Hot Standby System", shown in the
illustration below. On the CHS 110 module, all three indicators should be steady,
not blinking. A blinking Com Act light signals that your system has detected an
error. On the corresponding CRP module, the Ready indicator is a steady green.
The Com Act indicator on the primary unit should also be a steady green, while
the Com Act indicator on the standby RIO head should be blinking slowly.