


71
EN
(English)
Windows XP Firmware Upgrade Driver Installation (4)
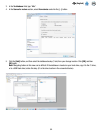
10. After the driver is installed, a reboot is required.
11. After the reboot, open the software, right-click the instrument icon, and select Upgrade firmware.
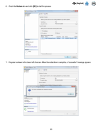
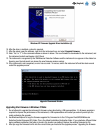
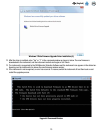
12. Enter “Yes” or “Y” in the command window as shown in below. The new firmware is downloaded to the instrument, and
the instrument restarts and begins a Self-Check.
13. The instrument is recognized by the 3M Molecular Detection Software and the instrument icon appears in the status bar.
Hovering over the instrument icon shows the new firmware revision number.
14. If the instrument is not recognized, an error has occurred. To recover, switch the instrument off and then back on and
restart the upgrade process.
UpgradeIt Command Window
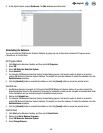
Upgrading the Firmware in Windows 7/Vista
1. Do not attempt to upgrade the instrument’s firmware unless directed by a 3M representative. If a firmware upgrade is
required to improve the performance of the instrument, a 3M representative will contact you and will provide you the
media containing the upgrade.
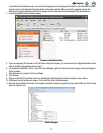
2. Use Windows Explorer to copy the firmware upgrade file, firmware.bin to the C:\Program Files\3M\3M Molecular
Detection System\Firmware\DFU folder. This is the default installation Destination folder. If you selected a different folder
during software installation, this folder is found in the location you defined. Replace the existing firmware.bin file.
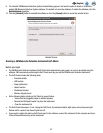
3. After you copy the firmware.bin file into the correct folder, you must start the upgrade process. Upgrading the firmware