


68
EN
(English)
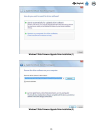
Starting a Self-Check
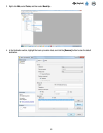
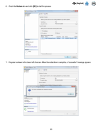
1. Power-cycle the 3M Molecular Detection Instrument, or right-click the instrument icon in the software status bar to
display the context-sensitive menu. You can also double-click the instrument icon to open the instrument tab.
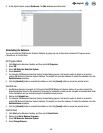
2. Select Start the Self-Check.
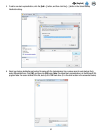
3. The instrument icon will change to white and the Instrument Status will change to Diagnose. You can view the
Self-Check progress bar in the instrument tab.
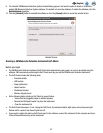
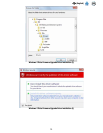
4. When the Self-Check is complete, a pop-up notification appears and shows the result (i.e., passed or failed). The
instrument status bar and icon also indicate the result, as shown in the table below:
Instrument Status Light Instrument Icon Result
Solid Orange or Green
Pass
Flashing Red
(Flashing)
Fail
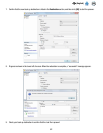
5. Click the [OK] button to dismiss the notification or the [View Report] button to view the results of the individual tests.
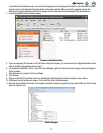
6. You can view past Self-Check results by selecting Instrument Self-Check Results in the Reports menu. Refer to the
section in this manual on Generating Reports for more information.
7. Refer to the Troubleshooting section for information about troubleshooting Self-Check failures.
Viewing the Error Log File
The 3M Molecular Detection Software generates an error log file that assists in troubleshooting software errors. Error
messages displayed in the software may refer to this file for more information about the specific error. Only one copy of this
file exists per user account on the computer, and it is used during every 3M Molecular Detection Software run. The file is
located in the following folder:
Windows XP
C:\Documents and Settings\<Username>\3M\3M Molecular Detection System\LOG
Windows Vista/7
C:\Users\<Username>\3M\3M Molecular Detection System\LOG
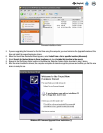
Upgrading the Firmware in Windows XP
1. Do not attempt to upgrade the instrument’s firmware unless directed by a 3M representative. If a firmware upgrade is
required to improve the performance of the instrument, a 3M representative will contact you and will provide you the
media containing the upgrade.
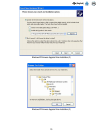
2. Use Windows Explorer to copy the firmware upgrade file, firmware.bin to the C:\Program Files\3M\3M Molecular
Detection System\Firmware\DFU folder. This is the default installation Destination folder. If you selected a different folder
during software installation, the this folder is found in the location you defined. Replace the existing firmware.bin file.
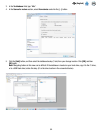
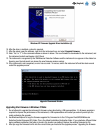
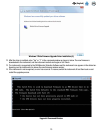
3. After you copy the firmware.bin file into the correct folder, you must start the upgrade process. Upgrading the firmware
is restricted to Administrator users. You can start the upgrade by clicking Upgrade firmware in the instrument’s context-
sensitive menu or the [Upgrade Firmware] button in the instrument tab. When you start the upgrade process, the
instrument is logically disconnected from the system and the instrument icon will disappear from the status bar.
4. A black UpgradeIt command window opens.