


47
EN
(English)
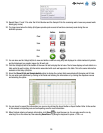
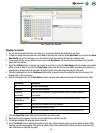
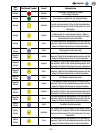
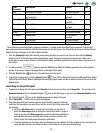
15. You can select the Results (List) to display the same data as the Results (Grid) but in a list form. The following fields are
shown:
• Well ID – The well ID that correlates to the well’s location on the 96-well grid.
• Sample ID – The identifier of the sample used in this test. The Results (Grid) view shows this information by
hovering the mouse over the well.
• Assay Type – The type of assay used. The Results (Grid) view shows this information as a color-coded box
around the well.
• Well Type – Either Sample, Reagent Control, Negative Control or Matrix Control.
• Kit Lot Number – The identifier of the kit lot used in this test. The Results (Grid) view shows this information by
hovering the mouse over the well.
• Result – The result of the test.
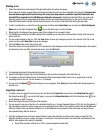
Exporting run results
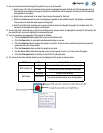
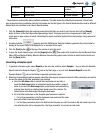
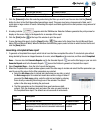
1. Select the Results (Grid), and then click the Export button.
2. You can export results in the form of a delimited data file, e.g., Comma Separated Values (.CSV) file. Use this feature if
you want to export the information for run definition to a LIMS or another system or if you want to export a run definition,
edit the run definition, and then import the edited run definition.
3. The default file type is a .CSV file. You can select other file types and delimiters in the Import and Export Options. Select
the delimiter that is preferred by the LIMS or other system to which the file is exported. Refer to the section in this
manual on import/export file formats.
• By default, the first row is a header row that contains field names. You can change this in the Import and Export
Options. Refer to the section in this manual on import and export options
• Two consecutive delimiters with nothing between them indicate a blank field.
4. The default export folder is defined using the Import and Export Options. Refer to the section in this manual on import
and export options.
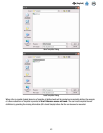
5. Click the Export button. When the Save as window appears, navigate to the folder into which you want to export the file.
The default export folder is defined using the Import and Export Options. Refer to the section in this manual on import
and export options.
6. Click the Save button.