


32
EN
(English)
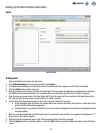
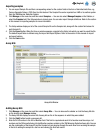
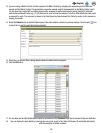
3. Click the Sample ID that you want to hide. Use the vertical scroll bar to display additional Samples if necessary. You can
press and hold [Shift] while you click another Sample ID to hide both Sample IDs and all Sample IDs between them. You
can also press and hold [Ctrl] while you select multiple Sample IDs to hide multiple Sample IDs.
4. Select the Hide button to delete the selected Sample ID.
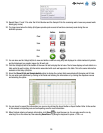
5. Click the [Apply] button to apply the change, or click the [OK] button to apply the change and return to the Start Page
window.
6. You can automatically hide sample IDs that have been used, but have not been used for a specified length of time. Select
the length of time using the Auto-hide samples every dropdown menu. For example, select Monthly to autohide samples
that were last used in a run one month ago.
7. Select the Show Hidden option to display Sample IDs that are hidden as well as Sample IDs that are not hidden.
Importing samples
1. You can import Sample IDs and their corresponding values for the custom fields in the form of delimited data files,
e.g., Comma Separated Values (.CSV) files. Use this feature if the Sample IDs can be exported from a LIMS or from
another system into the 3M Molecular Detection System.
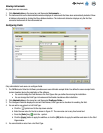
2. Click Manage on the menu bar, and then select Samples…. Only administrator level users can manage samples. You
can also select Manage Samples on the Sidebar, or select the Samples tab if the Setup window is already open.
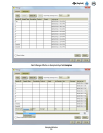
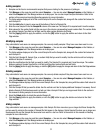
3. The Samples tab displays a list of the current Sample IDs along with the custom field values for each Sample ID.
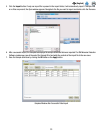
4. The default file type is a Comma Separated Values (CSV) file. You can select other file types and delimiters. Refer to the
section in this manual on import/export file formats.
• By default, the first row is a header row that contains field names. You can change this in the Import and Export
Options. Refer to the section in this manual on import and export options.
• The sequence of the fields in the samples import file must be identical to the sequence of the fields on the
Samples tab of the Setup window.
• The Sample ID is a required field and it must be unique.
• The data in a sample import file that’s intended to be imported into a list field must match one of the selections
for the list field. For example, a sample type must be Raw, Processed, or Environmental or one of the sample
types you defined.
• The default import folder is defined using the Import and Export Options. Refer to the section in this manual on
import and export options.