Teledyne API Model 200AU NO
X
Analyzer Instruction Manual, 02293, Rev. F
7-30
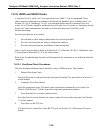
7.6.10.2 Precision Check
A periodic check is used to assess the data for precision. A one-point precision check must be
carried out at least once every 2 weeks on each analyzer at an NO
2
concentration between 0.08
and 0.10 ppm. The analyzer must be operated in its normal sampling mode, and the precision test
gas must pass through all filters, scrubbers, conditioners, and other components used during
normal ambient sampling. The standards from which precision check test concentrations are
obtained must be traceable to NIST-SRM. Those standards used for calibration or auditing may
be used.
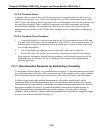
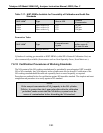
7.6.10.3 Precision Check Procedure
1. Connect the analyzer to a precision gas that has an NO
2
concentration between 0.08 and
0.10 ppm. NO
2
precision gas may be generated by either GPT or a NO
2
permeation tube. If a
precision check is made in conjunction with a zero/span check, it must be made prior to any
zero or span adjustments.
2. Allow the analyzer to sample the precision gas until a stable trace is obtained.
3. Record this value. NO and NO
x
precision checks should also be made if those data are
being reported. Information from the check procedure is used to assess the precision of the
monitoring data; see Section 2.0.8 (Q.A. Handbook) for procedures for calculating and
reporting precision.
7.6.11 Recommended Standards for Establishing Traceability
To assure data of desired quality, two considerations are essential: (1) the measurement process must
be in statistical control at the time of the measurement and (2) the systematic errors, when combined
with the random variation in the measurement process, must result in a suitably small uncertainty.
Evidence of good quality data includes documentation of the quality control checks and the
independent audits of the measurement process by recording data on specific forms or on a quality
control chart and by using materials, instruments, and measurement procedures that can be traced to
appropriate standards of reference. To establish traceability, data must be obtained routinely by
repeated measurements of standard reference samples (primary, secondary, and/or working
standards). More specifically, working calibration standards must be traceable to standards of higher
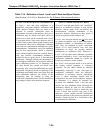
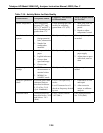
accuracy, such as those listed below in Table 7-17.


