


3-20 PathBuilder S24x, 26x, and 27x Switch Hardware Installation
Installing a T1 or E1 Dual Port Digital PBX Interface Card
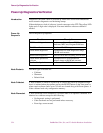
Installation
Procedure
Follow these steps to install the T1/CSU Daughter card.
Step Action
1 Power down the PathBuilder S200 series switch by unplugging the AC
power plug.
2 Remove the cables from the rear of the T1 Dual Port Interface card.
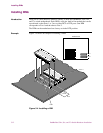
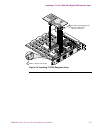
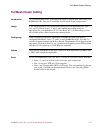
3 Remove the cover from the PathBuilder S24x, 26x, and 27x switch as
shown in Figure 4-1 on page 4-4.
4 Use a screw driver to loosen the bracket screw and remove the T1 Dual
Interface card.
5 Place the card on an antistatic mat.
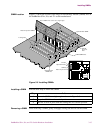
6 Locate the pin connectors on the T1 Dual Port Card. See Figure 3-6.
The upper connectors support Port 49 and the lower connectors support
Port 50.
7 Using a pair of long-nose pliers or a small screw driver, remove the
small jumpers from the connectors.
8 Carefully insert the T1/CSU Daughter Card(s) into the pin connectors.
Ensure that the card is seated securely.
9 Insert the T1 Dual Port card into expansion slot 8, aligning the card with
the card guides and making proper connection on the motherboard.
Ensure that the card is seated securely.
10 Secure the card to the chassis using the bracket screw.
11 Replace the PathBuilder S24x, 26x, and 27x switch cover.
12 Reconnect the cables to the T1 Dual Port card.
13 Plug in the AC power cord.