


2-6 Preparation and Unpacking
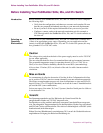
The PathBuilder S24x, 26x, and 27x Switch Rackmount Kit
Rackmount Kit
Parts
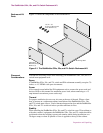
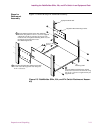
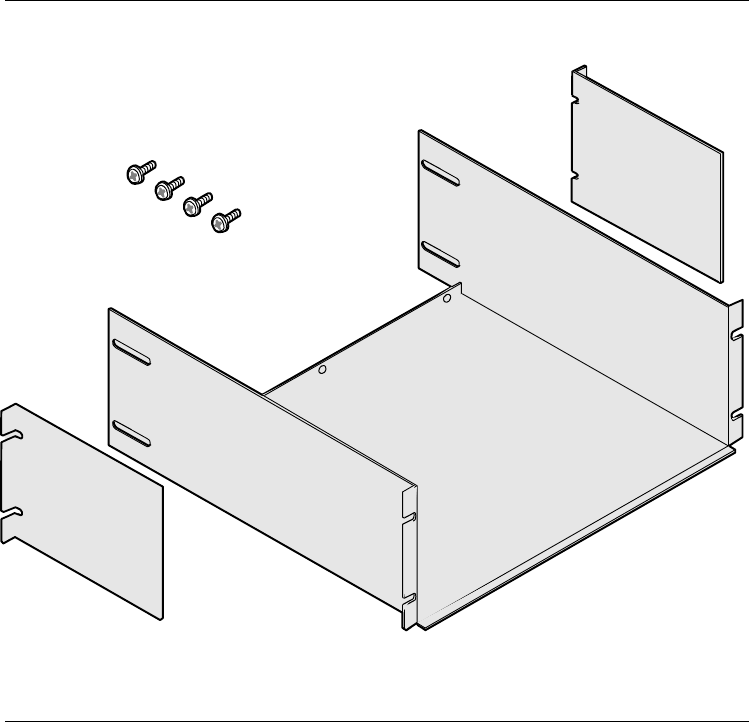
Figure 2-1 shows the components of the rackmount kit.
Figure 2-1. The PathBuilder S24x, 26x, and 27x Switch Rackmount Kit
Placement
Considerations
Consider the following issues when installing your PathBuilder S24x, 26x, and 27x
switch in an equipment rack:
Space
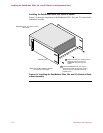
A PathBuilder S24x, 26x, and 27x switch and EIA rackmount assembly occupies 7.0
inches, or 4 U NEMA rack space increments.
Power
Allow enough room behind the EIA equipment rack to connect the power cord and
devices. Refer to this manual for maximum power load, when connecting to a 15
amp internal convenience power outlet strip.
Thermal
For proper ventilation, do not cover air vents at the rear of the unit. Where a front
door is present on a rackmount cabinet, installation of the PathBuilder S24x, 26x,
and 27x switch must allow a 2-inch clearance between the door and the PathBuilder
S24x, 26x, and 27x switch air inlet to provide sufficient air flow.
Stability
When installing the PathBuilder S24x, 26x, and 27x switch in a non-3Com cabinet or
with other vendors’ equipment, the PathBuilder S24x, 26x, and 27x switch should be
positioned so that the resulting system rack remains stable during installation on a
10-degree ramp or when 56 pounds of force is applied to the top of the cabinet.
Adjustable
Rear Mounting
Bracket (2)
10-32 x .38
Screws with External
Lock Washers (4)
Mounting Shelf