


17. Removal of the projector covers
17. REMOVAL OF THE PROJECTOR COVERS
About this chapter
Most maintenance and servicing procedures demand removing one or more of the projector covers to gain access to the parts to
maintain or to service. To avoid redundancy, all procedures about cover removing or installing are grouped together in this chapter.
The maintenance and servicing procedures also refer to this chapter if required. The procedures in this chapter describe, with
detailed step by step actions and illustrations, how to remove or install the projector covers. Note that some covers may only be
removed by qualified service personnel, see remarks above each procedure.
WARNING: Always switch off the projector and unplug the power cord at the projector side before removing
one of the covers.
Overview
• Removal of the front cover
• Removal of the side cover
• Removal of the lamp cover
• Removal of the input cover
• Installation of the front cover
• Installation of the side cover
• Installation of the lamp cover
• Installation of the input cover
17.1 Removal of the front cover
Necessary tools
7mmflat screw driver.
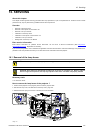
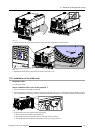
How to remove the front cover of the projector ?
1. Remove the lens. See chapter "Lens removal", page 24.
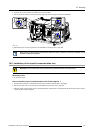
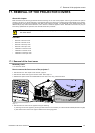
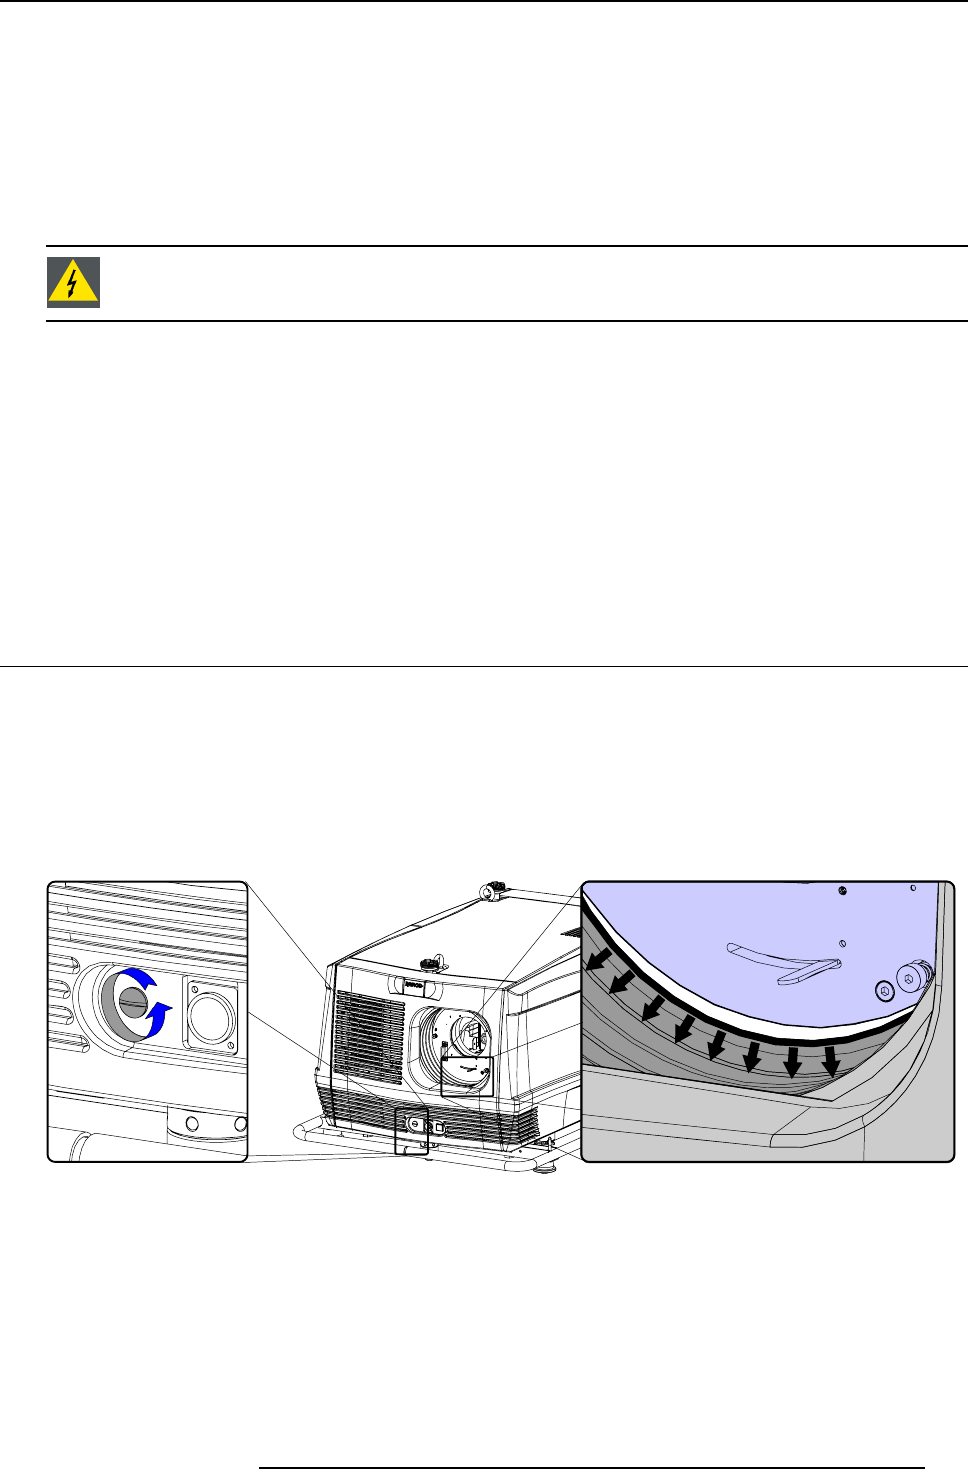
2. Remove the rubber dust ring from the lens holder. See image 17-1.
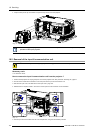
3. Release the captive screw at the middle bottom of the front cover, using a flat screw driver.
Image 17-1
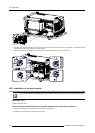
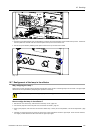
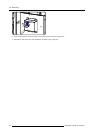
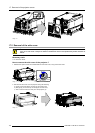
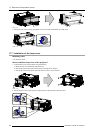
4. Remove the front cover from the projector doing the following:
a) standing in front of the projector, pull the right side of the front cover toward you until the latches release (left side is hinged)
b) then slide the front cover to the right to release it from the hinging points.
R5976986 FLM HD18 15/03/2010
191