13. Projector control
Overview
• DMX address
• DMX universe
• DMX monitor
• DMX mode
• Art-Net activation
• Home lens at startup
Art-Net DMX
When using a DMX console compatible with Art-Net, the Ethernet network serves as the link for DMX control.
Make sure that your lighting desk and all projectors are within the same IP address range. It can be necessary to set DHCP to [Off]
for each projector and to enter an IP address manually which is in the IP address range of the lighting console.
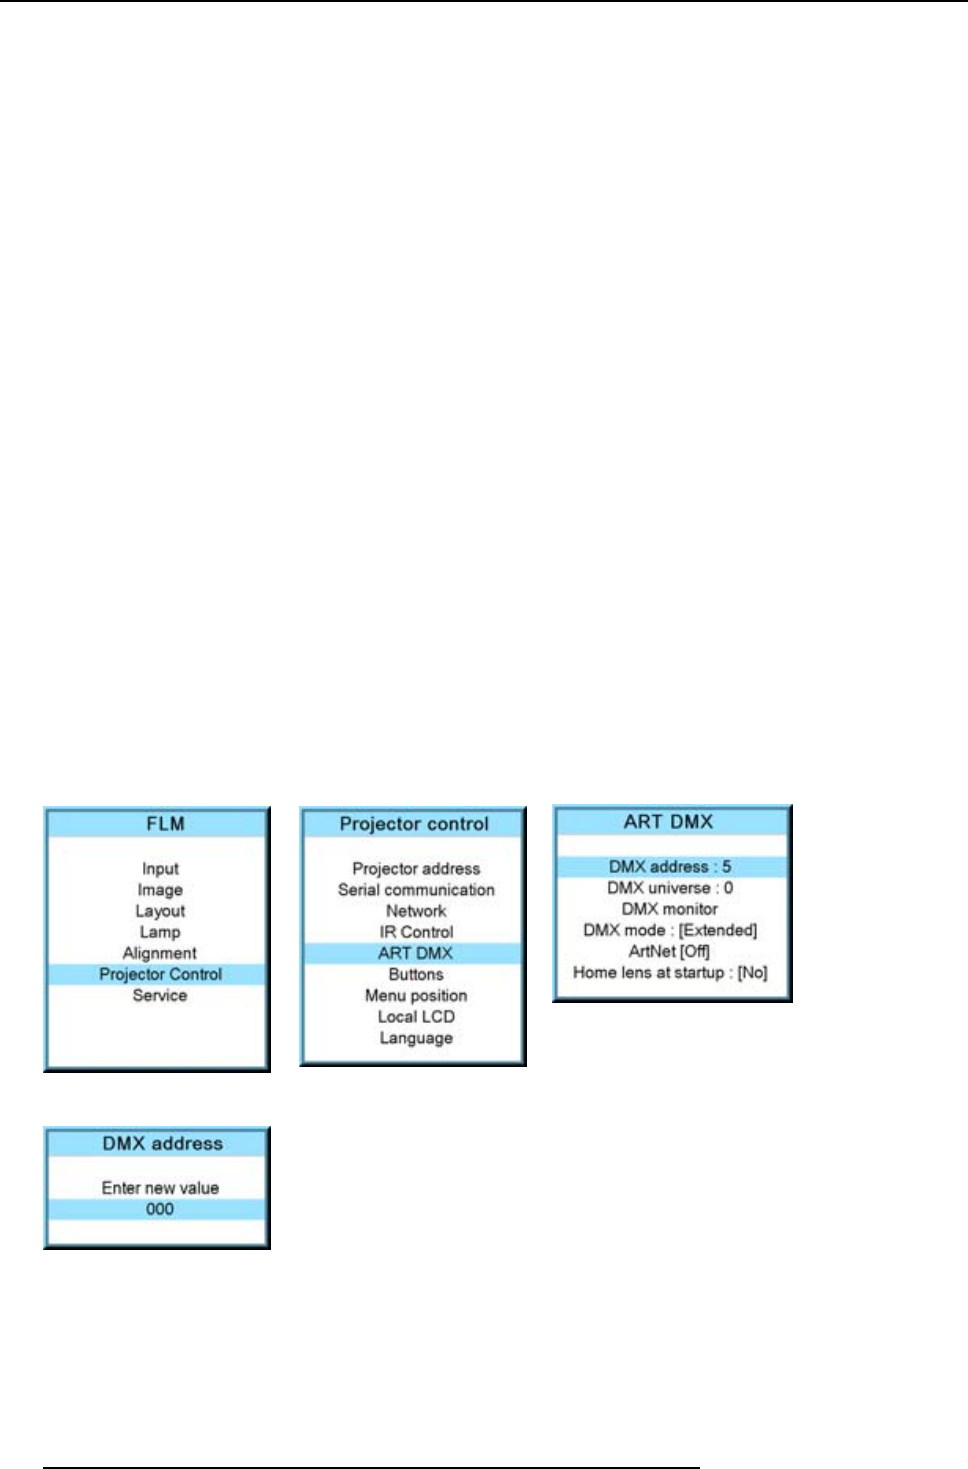
13.6.1 DMX address
What should be done ?
Before a projector can execute DMX commands, a unique address, called DMX address, should be given to the projector. This
address can vary from to 512.
How to set a DMX address
1. Press MENU to activate the menus.
2. Use the ▲ or ▼ key to select Projector control and press ENTER.
3. Use the ▲ or ▼ key to select ART DMX and press ENTER.
4. Use the ▲ or ▼ key to select DMX address and press ENTER.
The edit DMX address window opens.
5. Use the ▲ or ▼ key to select a new value
Or,
enter a value with the digit keys on the remote control or local keypad.
6. Use the ◄ or ► key to select the next digit and repeat step 5.
7. When the desired address is entered, press ENTER to store that address.
Image 13-36
Image 13-37
Image 13-38
Image 13-39
13.6.2 DMX universe
What can be done ?
Depending on the DMX mode, one DMX universe can contain a different number of projectors. E.g. DMX mode = basis, the DMX
universe can contain up to 256 projectors
152
R5976986 FLM HD18 15/03/2010


