12. Alignment menu
Image 12-54
12.6 Contrast enhancement
Purpose
Increase the contrast for all video and data sources.
How to change
1. Press MENU to activate the menus.
2. Use the ▲ or ▼ key to select Alignment and press ENTER.
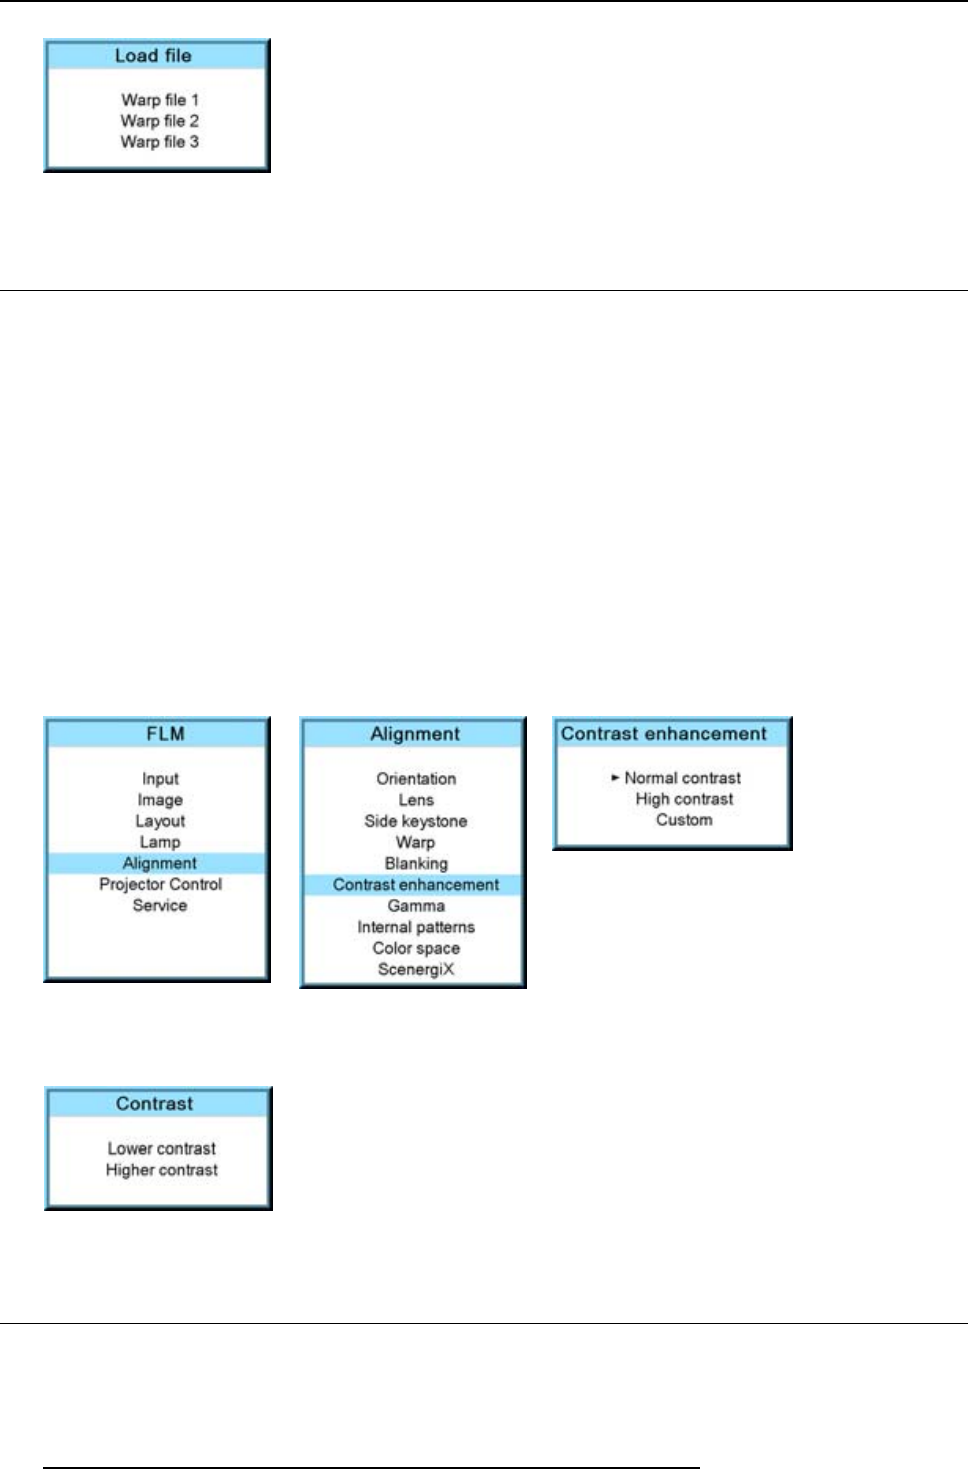
3. Use the ▲ or ▼ key to select Contrast enhancement and press ENTER.
The current selected contrast setting is indicated with an arrow.
4. Use the ▲ or ▼ key to select the desired setting and press ENTER.
The following settings are possible:
Normal contrast
High contrast
Custom
any value between normal and high contrast can be selected.
Image 12-55
Image 12-56
Image 12-57
5. When Custom is selected, the contrast menu is displayed.
6. Use the ▲ or ▼ key to select the desired adjustment and press ENTER.PressEXIT to return.
Image 12-58
12.7 Blanking
What can be done ?
Blanking adjustments affect only the edges of the projected image and are used to frame the projected image on to the screen and
to hide or black out unwanted information (or noise). A ’0’ on the bar scale indicates no blanking.
128
R5976986 FLM HD18 15/03/2010
