


11 - 25 11 - 25
MELSOFT
11. POSITIONING DEBUGGING
No. Item Description
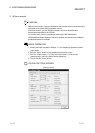
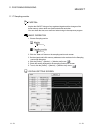
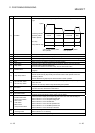
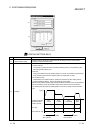
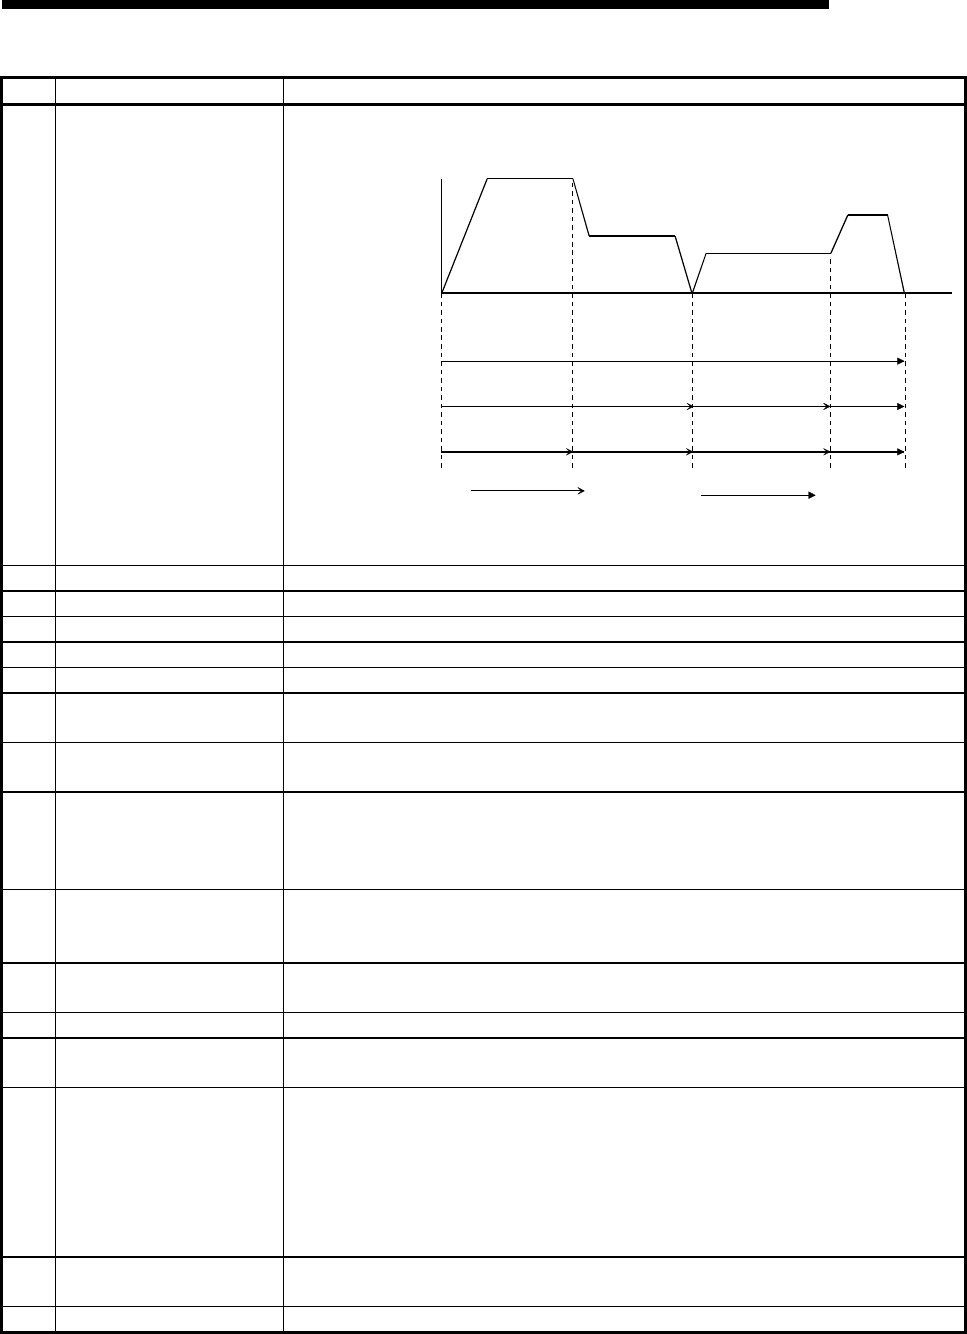
2) Condition
The following example shows the operating states of the axis according to the test operation
type.
Speed
Time
No.1
LOCUS
No.2
LOCUS
No.3
CONTINUE
No.4
END
Positioning data No.
Operation pattern
Position Operate
Dec. Step
Every Data No. Step
Axis is in step-standby status
after operation.
Axis is in stand-by status
after operation.
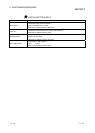
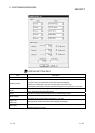
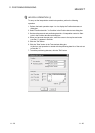
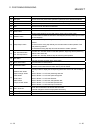
3) Start point Set the positioning data No. where test operation is started.
4) "OK" button Click this button to end the positioning data test setting.
5) Test set data Shows the operating conditions and start points set in the Position data test set dialog box.
6) Start Select the axis to be started in positioning data test operation.
7) "Start" button Click this button to start test operation with the positioning data No. set to the start point.
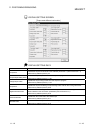
8) "Stop" button
Click this button to stop the selected axis.
Since the axis results in an error after a stop, click the "Error reset" button.
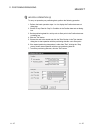
9) "Restart" button
Click this button to restart the axis which was stopped (resume positioning from where the axis
stopped).
10) "Step startup" button
Used when "Dec. Step" or "Every Data No. Step" was chosen in the test operation method.
Choose Continue during step standby and click this button to start operation of the next
positioning data No.
Choose Restart during step stop and click this button to restart. operation
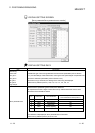
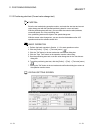
11)
"ALL axis start" button
"ALL axis stop" button
Click the "ALL axis start" button to start test operation, beginning with the positioning data No.
set to each axis.
Click the "ALL axis stop" button to stop all axes being test operated.
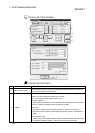
12) Axis status
Displays the states of the axes being tested.
If an error occurred, click the "Error reset" button.
13) "Error reset" button Click this button to reset the error.
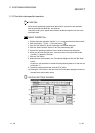
14) "M code off" button
Click this button to turn off the M code ON signal (XD, XE, XF).
However, the M codes stored in buffer memory are not cleared.
15)
"Position start" button
"Speed control" button
"OPR" button
"JOG" button
"MPG" button
"Torque control" button
Click any button to display the corresponding test screen of the Test data set dialog box.
Refer to Section 11.2.3 for the positioning start test.
Refer to Section 11.2.4 for the speed change test.
Refer to Section 11.2.5 for the OPR test.
Refer to Section 11.2.6 for the JOG operation test.
Refer to Section 11.2.7 for the MPG operation test.
Refer to Section 11.2.8 for the torque control test.
16)
"Edit" check box
"Teaching" button
Used for teaching.
Refer to Section 12.7 for teaching.
17) "Exit" button Click this button to end the positioning data test.