


Hardware installation 30
Model 3086FR ATM IAD User Guide 3 • Quick Start Installation
IP address Quick Start modification
The first parameter to change is the IP address from the default IP address of 192.168.1.1/24 (for the CP
units) or 192.168.200.11 (for CO units) to your selected IP address. Follow these steps. Comments are in
brackets […].
fi
ip list interfaces <enter>
[lists the characteristics of the different interfaces]
IP Interfaces:
ID | Name | IP Address | DHCP | Transport
-------|---------------|------------------|-------------|------------------
1 | ip1 | 192.168.200.10 | disabled | <bridge>
---------------------------------------------------------------------------
fi
ip set interface ip1 ipaddress 192.168.100.2 255.255.255.0 <enter>
[Sets the new IP address which you have selected.
The IP address in this example is for illustrative purposes only.]
fi
ip list interfaces <enter>
[To see if the change in IP address is correct]
fi
system config save <enter>
[To save the new IP address in flash memory.]
Wait for “configuration saved” message…
Saving configuration
fi
Configuration saved.
<enter>
fi
The IP address has now been successfully changed.
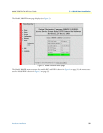
Web Operation and Configuration
Now that the IP address has been configured for your application, you can complete the configuration using
any standard web browser.
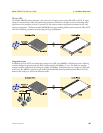
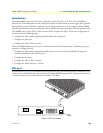
PC Configuration
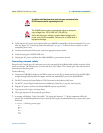
In order to connect the PC to the Ethernet LAN to communicate with the Model 3086FR, the PC’s IP address
should be on the same subnet as the modem.
Connect a straight-through Ethernet cable between the PC’s NIC or PCMCIA Ethernet card and an Ethernet
hub or switch.
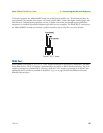
Web Browser
Do the following:
1. Launch a standard web browser such as Netscape Communicator or Internet Explorer (IE).
2. Enter the 3086FR’s IP address into the URL or Address field of the browser.