


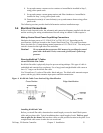

24-Pump, 128-Station Controller Chapter 3: Installation 17
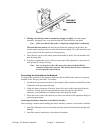
The latch has two catches; the first loosely holds the connector on the cable, the
second requires more pressure to close the connector tightly. The cable must be in the
correct position for the connector to close properly.
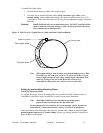
3. Drive the two screws at the center points about halfway down; first on the latch side,
then the hinge side.
4. Continue to tighten the screws a little at a time until fully tightened; no more than 15
inch-pounds (5.6 N
•m) of torque.
Note: You can only pierce the cable once. Once pierced, the KwikLock
connector must not be removed. This insures that the inner conductors
are not exposed to the elements.
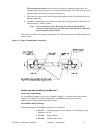
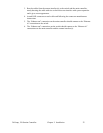
The system should now be properly terminated. You can now continue to install components
on the system.
Figure 4: Proper Termination Connections
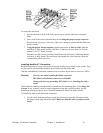
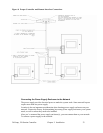
Addressing and Installing ArmorBlocks™
Addressing ArmorBlocks
An ArmorBlock permits you to give it a number “address” so that the controller network
system can recognize its location and function. ArmorBlocks are used at vacuum
hopper/receiver, pump, and alarm node locations.
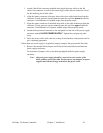
ArmorBlock Address Ranges
The number range of ArmorBlock addresses are as follows:
• 01 to 32 — Vacuum hopper/receiver stations; use a leading zero for
numbers 01 to 09.
• 33 to 44 — Pump stations
• 45 to 60 — Central purge valves