


24-Pump, 128-Station Controller Chapter 3: Installation 14
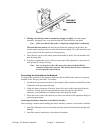
To install KwikLink cables:
1. Cut both black and grey cables to the proper length.
2. Use cable ties to attach KwikLink cables, black cable above grey cable, on the
vacuum tubing. Attach cable to the tubing with cable ties at about three-foot (3 ft./
1 m) intervals. Make sure that cable ties are snug, but not tightened enough to bend the
flat cable.
Caution! Install KwikLink cable on vacuum tubing only. DO NOT install KwikLink
cable on material conveying tubing, as static electricity formed at material
lines could disrupt system operation.
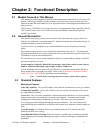
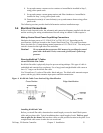
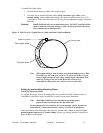
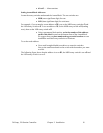
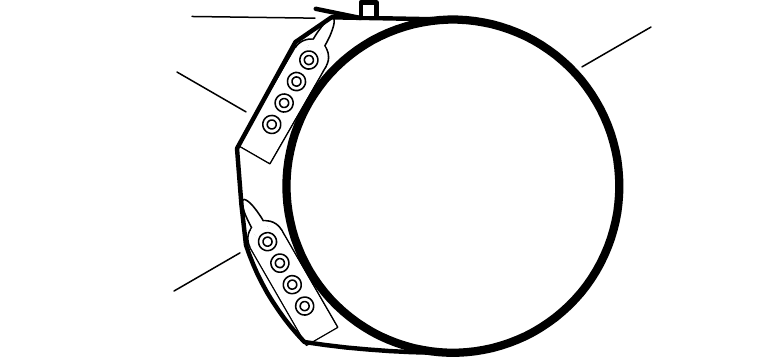
Figure 2: Side View of a Typical Power Cable and Data Cable Installation
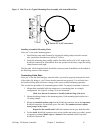
Note: When approaching a node location, stop the attachment process. Run
the cables over the node area (such as a T-valve) and make sure you
create a slight amount of slack when continuing the attachment with
cable ties. Doing so lets you install KwikLink connectors or
ArmorBlocks with greater ease, with less stress on the cable.
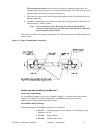
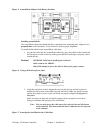
Setting Up and Installing Mounting Plates
Setting Up Mounting Plates
It’s a good idea to get all your mounting plates set up with KwikLink connector bases or
ArmorBlock cable bases before installation, as your system layout determines.
Note: ArmorBlock cable bases are installed on mounting plates
perpendicular in orientation to the flat cable runs.
Vacuum hoppers/receiver stations and vacuum pumps require 8-connector
ArmorBlocks; central alarm stations require 4-connector ArmorBlocks.
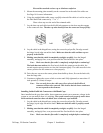
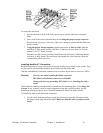
Make sure that each mounting plate has properly attached tube clamps as required. Each
mounting plate requires two (2) tube clamps. Always use locking washers, especially in
high-vibration environments.
Cable tie, buckle
Black power cable
Grey data cable
Vacuum tube