En
13
Connections
Connections
! Connect the power cord after all the connections between devices
have been completed.
Be sure to set the unit to standby mode and unplug the power cord
from the power outlet before making or changing connections
between devices.
! Be sure to use the power cord and AC adapter included with this
product.
! Power to this unit is supplied by the AC adapter or by USB bus
power.
Even without connecting the AC adapter, you can perform operation
simply by connecting this unit to a computer using a USB cable.
! Do not pull out the AC adapter during operation. If the AC adapter is
pulled out, this unit restarts by using USB bus power.
! Connect this unit and the computer directly using the included USB
cable.
! A USB hub cannot be used.
! Refer to the operating instructions for the component to be
connected.
Notes on running this unit with USB bus power
! Function restrictions, such a reduction in the output level and reduc-
tion in the LED brightness, may apply depending on the computer
used. In such a case, use the included AC adapter.
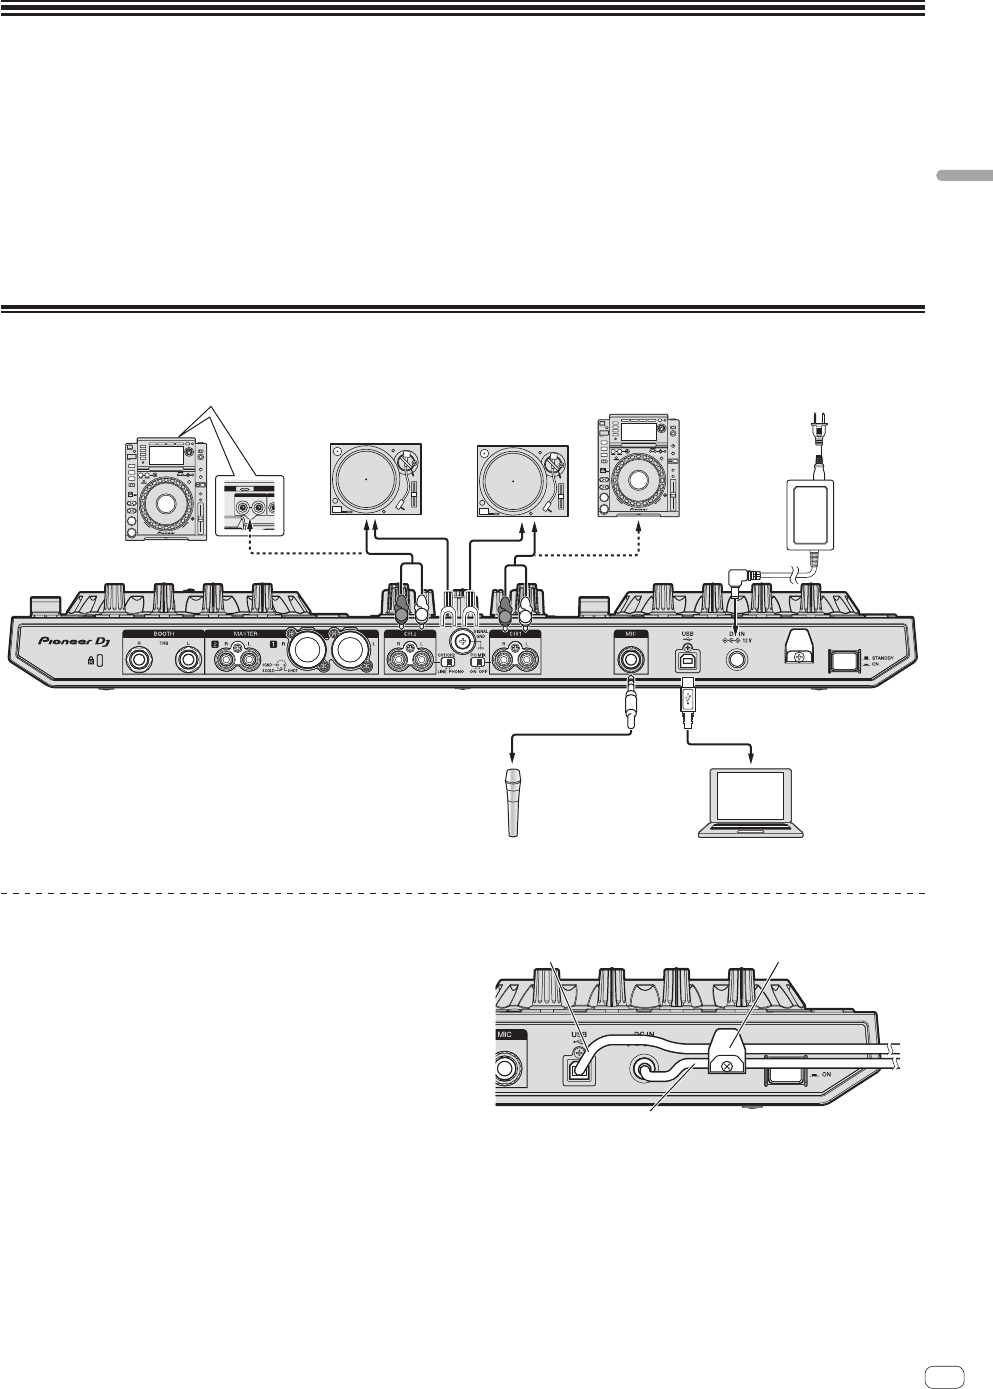
Connecting input terminals
Rear panel
AUDIO OUT
RL
CON
T
Analog player
Analog player
DJ player
DJ player
Computer
Microphone
R
L
R
L
Power cord
(included)
AC adapter
(included)
To power outlet
Cord hook
Hook the USB cable in the top of the cord hook, the AC
adapter’s power cord in the bottom.
Fasten the AC adapter’s power cord and USB cable in place by hooking
them on the cord hook. This prevents the power cord and USB cable
from being accidentally pulled and the plugs from being disconnected
from the terminals.
! Do not fasten with the base of the AC adapter’s power cord bent. If
used continuously under these conditions, the power cord may be
damaged, resulting in faulty contact.
! The sound will be interrupted if the AC adapter or USB cable is dis-
connected during playback.
USB cable
AC adapter’s power cord
Cord hook


