


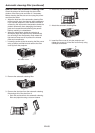
EN-62
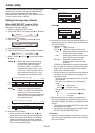
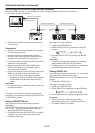
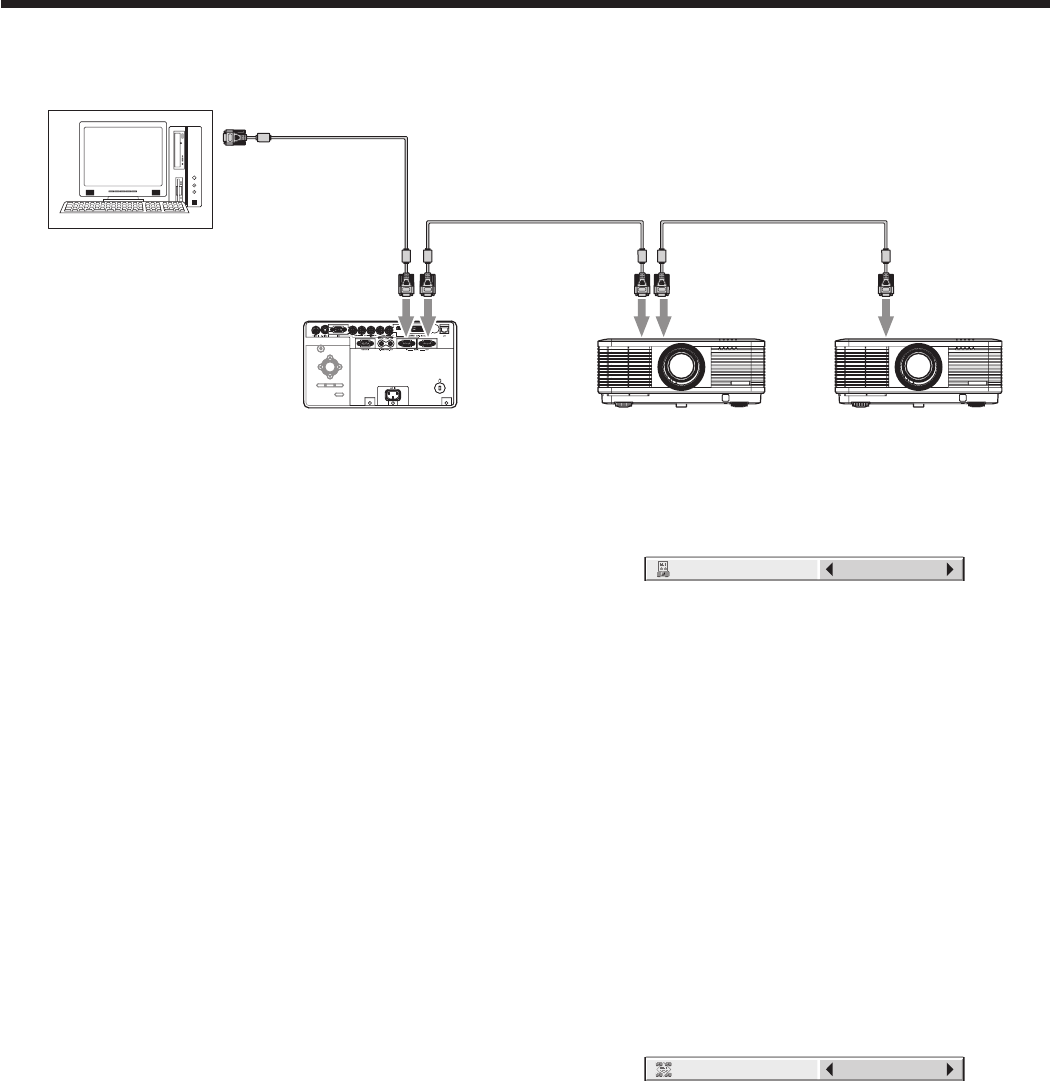
Monitoring and control using SERIAL terminal
Using the SERIAL terminal, you can monitor and control multiple projectors collectively or individually.
• For details, contact your dealer.
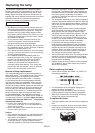
To RS-232C terminal
To SERIAL
IN
To SERIAL
IN
To SERIAL
IN
To SERIAL
OUT
To SERIAL
OUT
RS-232C cable (option) RS-232C cable (option)
• See also the instruction manuals of the devices to
be connected.
Connection
• Make sure that the power supplies of the projector
and the computer are off.
1. Connect one end of a commercially available
RS-232C cable to the SERIAL IN terminal on the
projector to be connected to the computer.
2. Connect the other end of the RS-232C cable to the
serial port on the computer.
3. Connect one end of an RS-232C cable to the
SERIAL OUT terminal on the projector that is
connected to the computer.
4. Connect the other end of the RS-232C cable to the
SERIAL IN terminal on the second projector.
• For the connection of the second and later
projectors, connect their SERIAL OUT terminals
and the SERIAL IN terminals using RS-232C
cables.
Important:
• In a system using a serial divider, don’t connect the
projectors as above.
To monitor and control the projectors collectively or
individually, it is necessary to assign PROJECTOR IDs
or GROUP IDs to them.
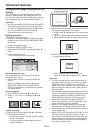
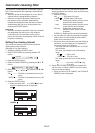
Setting PROJECTOR IDs
You can monitor and control multiple projectors
individually.
PROJECTOR IDs should be two-digit numbers “01” to
“63” or “ALL.” The other numbers cannot be used.
• The default PROJECTOR ID is ALL.
• By assigning the same PROJECTOR ID to multiple
projectors, you can monitor and control those
projectors collectively.
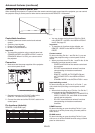
Advanced features (continued)
(See page 31 for menu setting.)
1. Display the FEATURE menu.
2. Select PROJECTOR ID by pressing the or
button.
PROJECTOR ID
ALL
3. Set the PROJECTOR ID by pressing the or
button.
Important:
• To monitor and control the projectors individually,
assign different PROJECTOR IDs to them.
• By assigning ALL, you can monitor and control the
projectors regardless of the ID numbers.
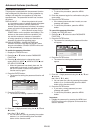
Setting GROUP IDs
By dividing the projectors into groups, you can monitor
and control them collectively by groups.
GROUP IDs should be A to Z. You can create up to 26
groups.
• The default GROUP ID is A.
(See page 31 for menu setting.)
1. Display the FEATURE menu.
2. Select GROUP ID by pressing the or button.
A
GROUP ID
3. Set the GROUP ID by pressing the or button.
Important:
• When you want to monitor and control the
projectors by groups, set a different GROUP ID.
• For details, contact your dealer.
RS-232C cable (option)