


EN-29
Viewing computer images (continued)
Setting the screen size
Change the setting of the SCREEN according to the type of the screen to be used.
(See page 31 for menu setting.)
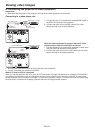
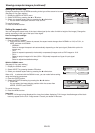
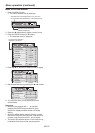
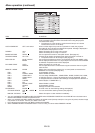
1. Display the INSTALLATION 2 menu.
2. Select SCREEN by pressing the or button.
3. Select your desired aspect ratio by pressing the or button.
• Youcanselecttheaspectratiofrom16:9,and4:3.
To cancel the menu:
4. Press the MENU button.
Setting the aspect ratio
You can change the aspect ratio of the input video signal (or the ratio of width to height of the image). Change the
setting according to the type of the input video signal.
How to change the settings:
With the remote control:
1. Press the ASPECT button.
• EverytimetheASPECTbuttonispressed,theaspectmodechangesfromNORMALto16:9,toFULL,to
USER, and back to NORMAL.
- NORMAL:
Select to change the aspect ratio automatically depending on the input signal. (Select this option for
normal use.)
- 16:9:
Select to expand squeezed (or horizontally compressed) images such as DVD images to 16:9.
- FULL:
Select to project images in full size (1024 x 768 pixels) irrespective of type of input signal.
- USER:
Select to adjust the detailed settings.
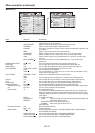
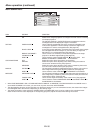
With the SIGNAL menu:
(See page 31 for menu setting.)
1. Display the SIGNAL menu.
2. Select ASPECT by pressing the or button.
3. Select your desired aspect ratio by pressing the or button.
When 16:9 is selected with the SIGNAL menu, you can make further setting
using the following procedures.
4. Press the ENTER button.
5. Select the POSITION setting by pressing the or button.
• POSITION:
You can select the image display position within the screen from
UPPER, CENTER, and LOWER.
To cancel the menu:
6. Press the MENU button.
Important:
• Whena16:9imageiskeptdisplayedforalongtimebeforedisplayingFULLimage,theafterimagesoftheblack
bars may appear on the FULL image screen. Consult your dealer in this case.
A
U
SIGNAL
MEMORY CALL
AUTO
ASPECT
NORMAL
REMOTE 1 MODE
FILTER MENU
INSTALLATION 2
AUTO POWER ON
AUTO POWER OFF
OFF
ON
BLUE
AUTO
5min
IMAGE CAPTURE
SPLASH SCREEN
DVI LONG CABLE
BACK COLOR
1
1
2
2
opt.
ON
ENTER
ENTER
SETUP
SCREEN
4:3
SIGNAL
ASPECT – 16:9
1 2
opt.
POSITION CENTER
12