


EN-39
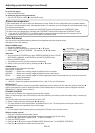
SIGNAL menu
1
1
2
2
opt.
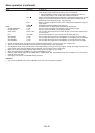
SIGNAL
RESOLUTION (MEMORIZE)
VERTICAL
FREQUENCY
HORIZONTAL
FREQUENCY
HORIZ. PIXELS
VERT. LINES
EXECUTE
CANCEL
60.00 Hz
1
48.36 KHz
1024
768
OFF
0
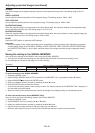
SHUTTER(L)
0
SHUTTER(LS)
0
SHUTTER(RS)
LPF
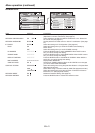
SIGNAL
USER
1
1
2
2
VERT. SYNC. AUTO
CLAMP WIDTH
0
SHUTTER(U)
opt.
1
OK
OK
?
CLAMP POSITION
R G B
R G B
V
H
A
U
0
100%
COMPUTER INPUT
AUTO
OVER SCAN
HOLD
USER
FINE SYNC.
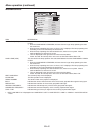
SIGNAL
1
1
2
2
VERT. POSITION 0
MEMORY CALL
RESOLUTION
(MEMORIZE )
AUTO
HORIZ. POSITION
0TRACKING
opt.
ENTER
0
1024 x 768
ON
ASPECT
NORMAL
SIGNAL MEMORY
MEMORIZE
ITEM SETTING FUNCTION
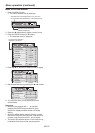
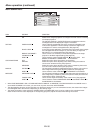
MEMORY CALL Use to select the setting of
SIGNAL MEMORY
already saved. Impossible to
select if no setting has been saved. (See page 46.)
AUTO AUTO is selected by default. It optimizes the signal format automatically
depending on the type of video signal supplied from the computer.
1-xxx
-
8-xxx
Use
to select the SIGNAL MEMORY already saved.
The memory number
relevant to the input signal is displayed. Press the ENTER button to clear the
setting already saved.
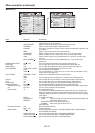
SIGNAL MEMORY MEMORIZE
The settings in the SIGNAL menu can be saved. (See page 46.)
Up to 8 settings can be saved. You can select the memory number. For
example, when you save the signal setting of 720p50 to the memory 1, the
memory name is displayed as 1-720p50.
When the settings are already memorized in the selected number, the settings
will be overwritten.
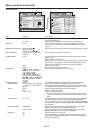
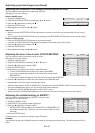
RESOLUTION (MEMORIZE
)
The current resolution is displayed. To change the current setting, press the
ENTER button to display the RESOLUTION (MEMORIZE) menu. The new
setting can be saved to MEMORY.
VERTICAL FREQUENCY
- The vertical frequency of the currently projected video signal is displayed.
HORIZONTAL FREQUENCY
- The horizontal frequency of the currently projected video signal is displayed.
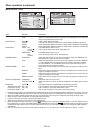
HORIZ. PIXELS 640-1920 The number of horizontal pixels of the currently projected video signal is
displayed. When you change the current setting, select EXECUTE, and then
press the ENTER button, the image is automatically adjusted according to
the resolution you set. The adjustment result can be saved to MEMORY.
VERT. LINES 350-1200 The number of vertical lines of the currently projected video signal is
displayed. When you change the current setting, select EXECUTE, and then
press the ENTER button, the image is automatically adjusted according to
the resolution you set. The adjustment result can be saved to MEMORY.
EXECUTE OK Press the ENTER button to start the automatic adjustment. At the completion
of the automatic adjustment, a message is displayed and you can save the
adjustment result to MEMORY.
CANCEL OK The process to change the current resolution is canceled and the SIGNAL
menu is displayed.
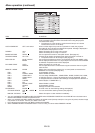
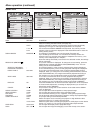
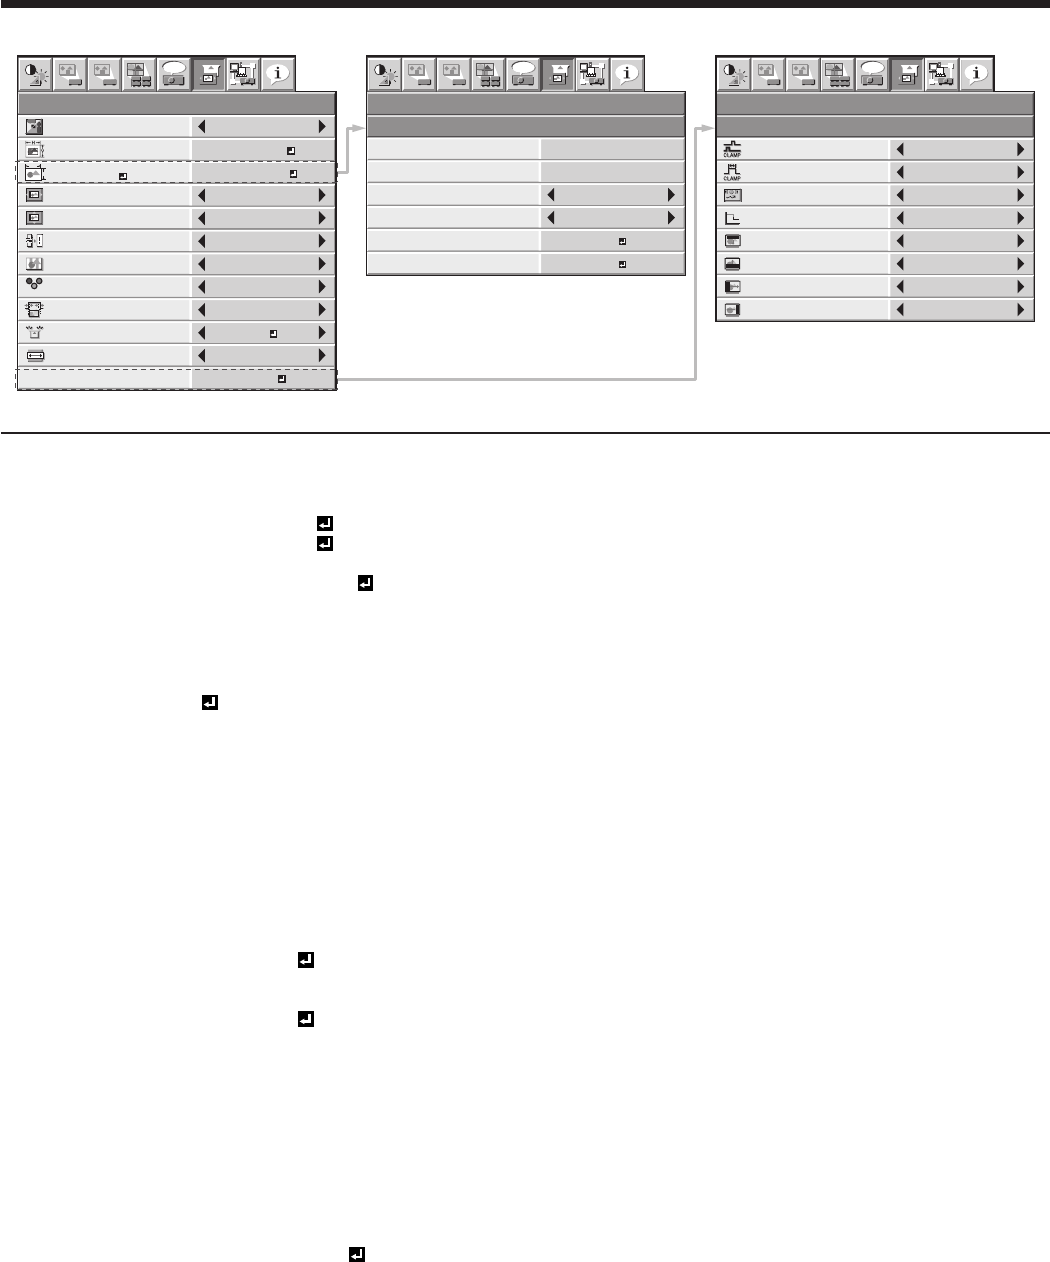
HORIZ. POSITION 0-999 Use to adjust the horizontal position of the projected image.
VERT. POSITION 0-999 Use to adjust the vertical position of the projected image.
FINE SYNC. 0-31 Use to eliminate flickering or blur, if appears, viewing the projected image.
TRACKING 0-9999 Use to eliminate vertical wide stripes, if appears, viewing the projected image.
COMPUTER INPUT AUTO The proper setting is automatically selected.
RGB Select this option when connecting the projector to high definition video
equipment having R, G, and B output terminals.
YC
B
C
R
/YP
B
P
R
Select this option when connecting the projector to a DVD player or other device
having Y, C
B
, and C
R
(or Y, P
B
, and P
R
) component video output terminals.
OVER SCAN 100%-90% Use to adjust the display area of projected image.
HOLD OFF / ON Use to adjust the image when flagging occurs near the top of the screen.
Menu operation (continued)