


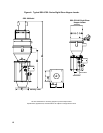


18
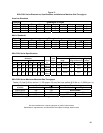
For new installations or mounting on other manufacturer’s equipment, a hole location template
is included in the information packet.
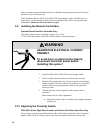
Important!
We are not responsible for equipment damage
from excessive processing machine vibrations.
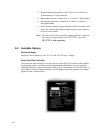
3-5 Mounting Tips
• Run a bead of silicone sealant around the mounting flange before
seating the hopper loader. This provides an additional seal.
• Use rivets to mount the hopper loader. Bolts, nuts, and washers can
loosen, fall into, and damage process equipment.
• Check across the mounting flange with a bubble level. Level
installation ensures proper material discharge valve operation.
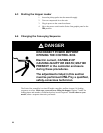
• Install controller boxes to a non-moving solid structure to avoid
loosening any wiring from vibration.
• Remove all rubber banding and any other packaging materials from
around the flapper dump valve before installation for proper
operation.
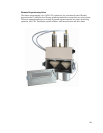
3-6 Attaching the Pickup Wand
Slide the flex hose onto the material inlet and pickup wand. Use the hose clamps supplied to
secure the flex hose. The flex hose should not cover the aeration holes on the pickup wand.
The pickup wand needs no adjustment for most applications. Insert it into the material to be
conveyed and it will work.
Some applications require a more defined air-to-material ratio. Cover one or more of the holes
at the top of the pickup wand.
3-7 Making Compressed Air Connections
Your SSL/CSL or SSIL/CSIL hopper loader requires a clean, dry, 80 to 120 psi (551.6 to
827.4 kPa/5.52 to 8.27 bars) compressed air supply. A filter, regulator, and shutoff valve are
recommended components of your in-plant compressed air supply.
You may need to install an accumulator in your air supply system to enhance blowback
effectiveness if your system cannot consistently meet these requirements. Make sure you use
full-sized
3
/8”-diameter pipe or tubing when making connections.
3-8 Making Electrical Connections
The controller you selected is shipped pre-wired to the SSL/CSL or SSIL/CSIL Series hopper
loader. Units are supplied with a power cord with plug wired to the control unit, ready to plug
into an appropriately grounded three-prong receptacle.