


51
OWNER’S MANUAL
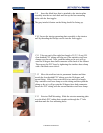
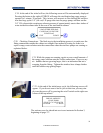
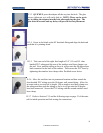
C.5 Using a 2” hole saw bit, enlarge the pilot hole on the inte-
rior surface of the wall to 2”. Repeat this process on the exterior
surface of the wall using the pilot hole as the center point. You
should now have a 2” hole through the entire wall.
C.6 Take the Interior wall plate assembly (marked "D") with
the 90 degree elbow attached and insert the black tube through the
hole to the outside. Center the tube inside the 2” diameter hole
and mark the location of the four plastic toggles.
C.7 Remove the interior wall plate assembly and drill the four
toggle mounting holes using a 3/8” (.95 cm) bit.
C.8 Insert four of the toggles into the interior mounting holes
and tap them flush against the inside surface of the wall.
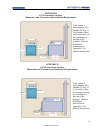
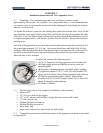
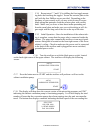
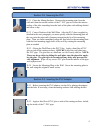
C.4 Interior Wall Mounting: Choose a location on the wall that is
directly above the exhaust bulkhead fitting coming out of the back
of the sterilizer (See lower picture on page 3). This is the location
where the exhaust hose will run through the wall to the outside.
CAUTION! Make sure you are not drilling into any struc-
tural members, wires or pipes. With the long drill bit, drill all
the way through to the outside.
© Andersen Products Ltd