


Setup Lexicon
3-6
CHANGING INPUT NAMES (continued)
Note:
Pressing the arrow button closes the menu and returns to the INPUT
NAME menu.
4. Repeat step 3 to enter all characters in the new name. When the
input name you want is displayed, press the arrow button to
close the menu and return to the INPUT NAME menu.
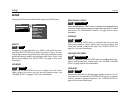
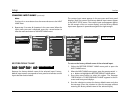
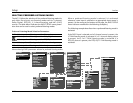
The custom input name appears in the on-screen and front-panel
displays. Both the custom and factory-default input names appear
in the INPUT SETUP menu. The custom input name appears against
the left margin of the on-screen display, and the factory-default
input name appears in parentheses against the right margin.
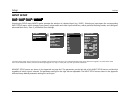
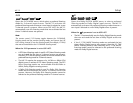
RESTORE DEFAULT NAME
Restores the factory-default name of the selected input. Factory-
default input names correspond to front-panel and remote control
input selection button labels.
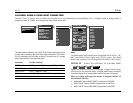
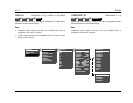
To restore the factory-default name of the selected input:
1. Follow the RESTORE DEFAULT NAME menu path to open the
INPUT NAME menu.
2. When the INPUT NAME menu opens, press the remote control
or buttons to highlight the RESTORE DEFAULT NAME option.
3. Press thearrow button to select this option. The message:
“PRESS MENU V TO RESTORE INPUT NAME” appears in the on-
screen and front-panel displays.
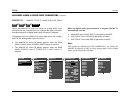
4. Press thebutton to restore the factory-default name and close
the message. (Press thebutton to close the message without
restoring the factory-default name of the selected input.)
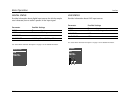
MAIN MENU
MODE ADJUST
AUDIO CONTROLS
SETUP
DVD1
DVD2
SAT
VCR
TV
CD
TUNER
DVD1 INPUT NAME
EDIT INPUT NAME
RESTORE DEFAULT NAME
PRESS MENU V TO
RESTORE INPUT NAME
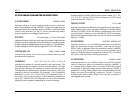
INPUT SETUP
DVD1
DVD2
LD
TV
SAT
VCR
CD
PVR
GAME
TAPE
TUNER
AUX
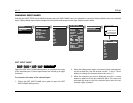
SETUP
INPUTS
SPEAKERS
REAR PANEL CONFIG
DISPLAYS
VOLUME CONTROLS
TRIGGERS
LOCK OPTIONS
LIVE! CALIBRATION
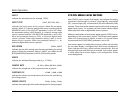
DVD1 INPUT SETUP
NAME
DIGITAL IN
ANALOG IN
VIDEO IN
COMPONENT IN
2-CH
MIC LIVE! MED
D
DVD1
COAX-1
NONE
AUTO
S-VIDEO-1
1
FILM
5.1 FILM
FILM
ANLG IN LVL
MAIN ADVANCED
5.1a
5.1a FILM
RECORD ADVANCED
RECORD IN
DIGITAL
ZONE2 IN DIGITAL
INPUTSSETUP
DVD1
NAME
RESTORE DEFAULT NAME