En
20
Slip hot cue
Hot cue rolling is also possible during the slip operation.
= Using the hot cue roll function (p.23)
1 Press the [HOT CUE] mode button.
Set the hot cue mode.
2 Set the hot cue.
Press a performance pad to set the hot cue.
3 Press the [SLIP] button.
The mode switches to the slip mode.
4 During playback, press and hold a performance pad.
Playback starts from the position at which the hot cue was set. Playback
continues as long as the performance pad is pressed.
Normal playback continues in the background while the hot cue is
playing.
5 Release your finger from the performance pad.
Playback starts from the position reached in the background.
! To cancel the slip mode, press the [SLIP] button again.
Slip braking
1 Adjust the [BRAKING] — [STOP TIME] setting in the
[SETUP] menu’s [DJ Preference] tab.
The [BRAKING] setting adjusts the speed at which the track stops from
the play mode.
When using slip braking, adjust the [BRAKING] control on the com-
puter’s screen to about the 9 o’clock position and set so that the sound
stops slowly.
2 Press the [SLIP] button.
The mode switches to the slip mode.
3 During playback, press the [PLAY/PAUSE f] button.
Playback slowly stops while the button is being pressed. Normal play-
back continues in the background while playback is slowly stopping.
4 Press the [PLAY/PAUSE f] button again.
Playback starts from the position reached in the background.
! To cancel the slip mode, press the [SLIP] button again.
Auto slip looping
1 Press the [SLIP] button.
The mode switches to the slip mode.
2 Press the [1/2X (IN)] or [2X (OUT)] button.
Select the auto loop beat.
3 Press the [AUTO LOOP] button.
A loop with the specified number of beats is set and loop playback starts.
Normal playback continues in the background during loop playback.
4 Press the [AUTO LOOP] button again.
Looping is canceled and playback starts from the position reached in the
background.
! To cancel the slip mode, press the [SLIP] button again.
Using effects
Serato DJ is equipped with two effect units: FX1 and FX2. Their effects
can be applied to the master output or to the selected deck. The follow-
ing describes how to operate this unit to assign effect unit 1 (FX1).
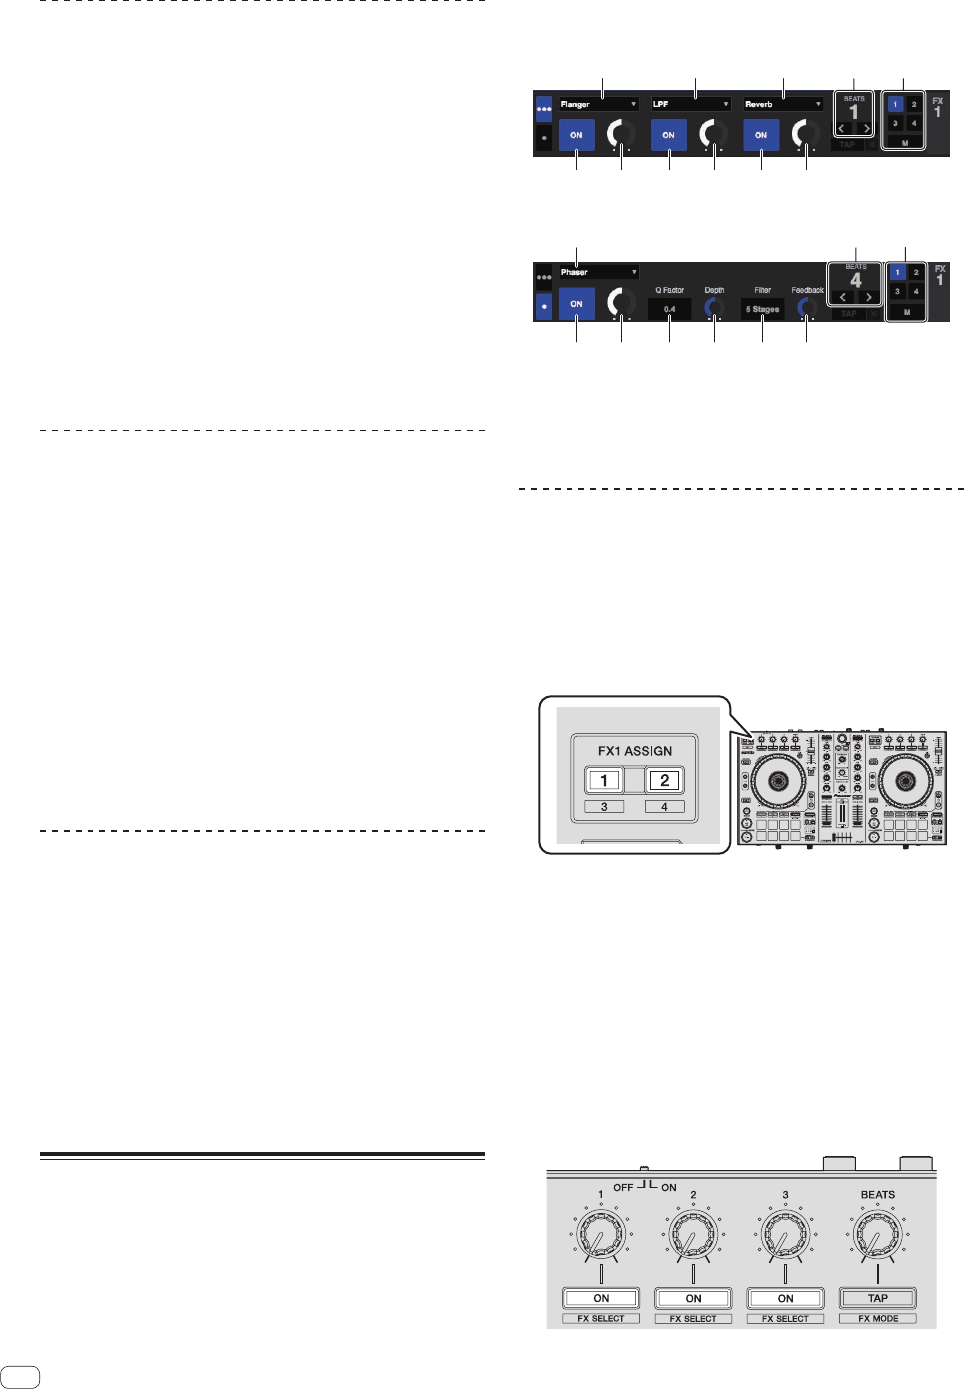
Serato DJ effects unit screen display
Multi FX mode: Up to three effects can be selected per effect unit, and
each effect has one adjustable parameter.
Single FX mode: One effect can be selected per effect unit and there are
multiple adjustable parameters.
1 This displays the effect type.
2 This displays the effect time.
3 This displays the number of the deck to which the effect unit is
assigned.
4 This displays the effect parameter status.
5 This displays whether the effect is on or off.
Operating in the multi FX mode
1 Press the [TAP (FX MODE)] button while pressing the
[SHIFT] button to switch Serato DJ’s DJ-FX mode to the
multi FX mode.
The mode switches between the multi FX mode and single FX mode each
time the buttons are operated.
2 Press the [FX ASSIGN] button on the left side to select
the deck to which the effect is to be assigned.
Press the [FX ASSIGN] 1 button to assign the effect to deck 1, the
[FX ASSIGN] 2 button to assign the effect to deck 2.
The number of the deck to which the effect is assigned is highlighted on
the Serato DJ screen.
! Press the [FX ASSIGN] 1 button while pressing the [SHIFT] but-
ton to assign the effect to deck 3, press the [FX ASSIGN] 2 button
while pressing the [SHIFT] button to assign the effect to deck 4.
! To apply the effect to the master output, click [M] on the
computer.
3 Press the effect parameter 1 button while pressing
the [SHIFT] button to select the first effect type.
To select the second effect type, press the effect parameter 2 button
while pressing the [SHIFT] button.
To select the third effect type, press the effect parameter 3 button while
pressing the [SHIFT] button.
The currently selected effect type is displayed on the Serato DJ screen.


