16. Servicing
16. SERVICING
About this chapter
This chapter contains general servicing procedures like lamp house replacement, input unit replacement etc. These procedures
may only be performed by qualified technical service personnel.
Overview
• Inserting an input module
• Removal of the lamp house
• Installation of the lamp house
• Removal of the front cover
• Mounting the front cover
• Removal of the lamp cover
• Mounting the lamp cover
• Replacement of the high density dust filter
• Remove and clear metal front filter
Extra service information
Extra service information for qualified service technicians can be found on Barco’s Partnerzone (URL:http:\\my.barco.com). Regis-
tration is necessary.
If you are not yet registered, click on Partnerzone registration and follow the instructions. With the created login and password, it is
possible to enter the partnerzone where you can find extra service information about the projector.
16.1 Inserting an input module
WARNING: Switch off the projector and unplug the power cord before starting the procedure.
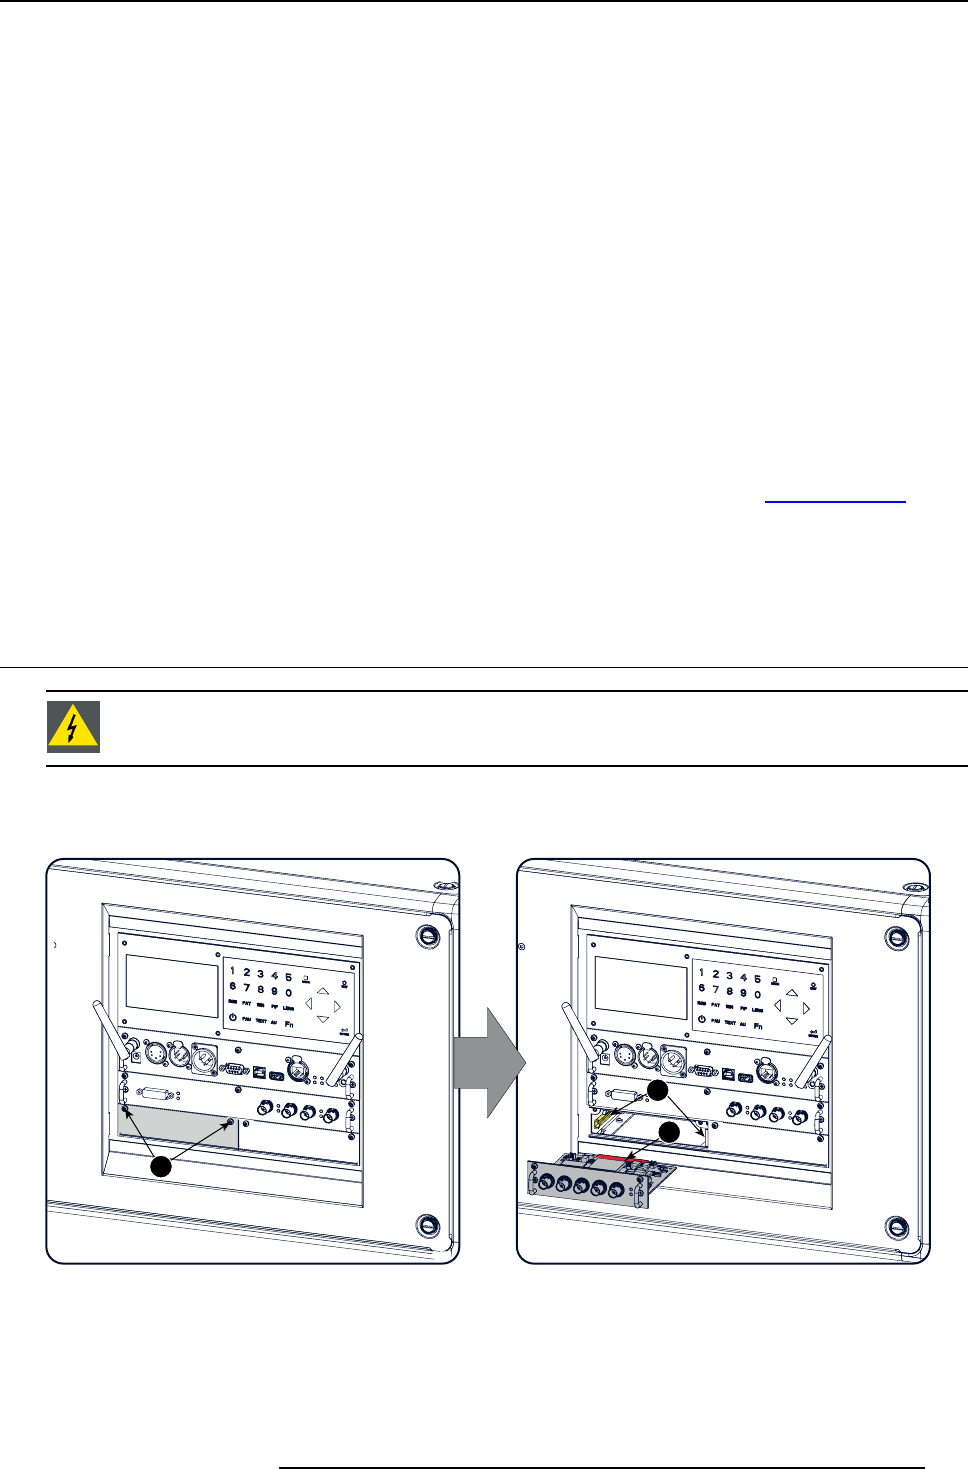
How to insert
1. Loosen both screws of the dummy cover plate (1).
1
2
3
Image 16-1
Insert input module
2. Take off the dummy cover plate.
3. Insert the new input module in its compartment.
Make sure the module seats in its sliders (2).
Pull in the module until the contacts (3) are fully inserted into the connectors.
4. Fixate both fixation screws.
R5905032 HDX SERIES 05/12/2014
293


