


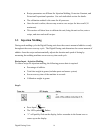


Digital Dosing Units
9
3. Press Input to display #2, “Shot size of current mold”. Using arrow keys,
set the total shot size (parts and runners) of the current mold capacity in grams.
4. Press Input to display #3, “Screw recovery time”. Using arrow keys, set
the screw recovery time (in seconds). For Extrusion Constant operation, skip this step!
5. Press Input to display #4, “Calibration weight for additive”. Enter ’0’ and proceed to
calibration mode below for calibration of additive material.
Recipe Setup For Extrusion:
1. Turn power switch to ON position.
2. Press Input to display #1, “Additive %”. Using arrow keys, set additive
ratio.
3. Press Input to display #2, “Throughput of extruder”. Using arrow keys,
set the total extruder throughput in g/min or lb/min.
4. Press Input to display #3, “Extruder screw speed”. Using arrow keys,
set the extruder screw speed RPM expected during production.
NOTE: for Extrusion Constant operation, this step will be skipped.
5. Press Input to display #4, “Calibration weight for additive”. Enter ’0’ and proceed to
calibration mode below for calibration of additive material.
Calibration:
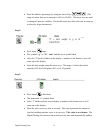
1. Press “Calibration” button to start this procedure. Display will show - -
- -
2. Place the plastic calibration cup on the scale and tare so that the weight of the cup
(approx. 24gr.) is not calculated in the calibration procedure.
3. Remove cover of the calibration box, secured by two 5mm Allen screws, under the
dosing disc assembly and insert plastic cup provided in top of dosing hopper.
4. Press “Run” and the dosing disc turns 1/4 turn. This fills all pockets of
dosing disc. Dump the dosed material back into the dosing hopper without weighing
and replace plastic cup in calibration box.
5. Press “Run” and the dosing disc turns 1 complete revolution. Remove
the calibration cup with the material and place on the gram scale. Enter the weight on
the scale into the controller using the arrow keys. Empty and replace
calibration cup.