Shared Folders
44
ReadyNAS OS 6.0
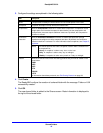
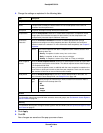
4. Change the settings as explained in the following table.
Item Description
Properties
Name A unique name to identify the shared folder. Do not include spaces in the name. All
chara
cters must be alphanumeric.
Description An optional description to help identify the shared folder.
Compression Select the Com
pression check box to enable data compression. Compression saves
storage space and increases the speed of data transfers, but the compression and
decompression processes require additional resources.
Continuous
P
rotection
Select the Continuous Protection check box to enable data protection through
snapshots and configure how often snapshots are taken. By default, the Continuous
Protection check box is selected. For more information about snapshots, see Chapter 5,
Snapshots.
Interval The interval specifies how often a snapshot is t
aken. Make a selection from
the drop-down list:
• Hour
ly. A snapshot is taken every hour on the hour.
• Da
ily. A snapshot is taken every day at midnight.
• W
eekly. A snapshot is taken every week on Friday at midnight.
Allow Snapshot
Access
Select the Allow Snapshot Access check box to allow snapshot access to anyone who
has permission to access the shared folder. The default snapshot access folder displays
in the Snapshot folder field.
When you allow snapshot access, a subfolder with the name sn
apshot is created on the
shared folder to allow users access to data from past snapshots. Users can then access
older versions of their files or recover files that were deleted.
ReadyDLNA Select the Rea
dyDLNA Service check box to enable ReadyDLNA for the folder. For
more information about ReadyDLNA, see ReadyDLNA on p
age 186.
Media
Type
Specify the type of media that you want to stream from the folder. Make a
selection from the drop-down list:
• All
• Video
• Audio
• Images
Access
For information about how to provide folder access to users and groups, see Set Network Access Rights to
Shared Folders on
page 48.
Security
For information about how to configure access rights for files and folders, see Set Up Access Rights to Files
and Folders on
page 57.
5. Click Apply.
6. Click OK.
Your changes are saved and the pop-up screen closes.


