47
10. The Walking Kit
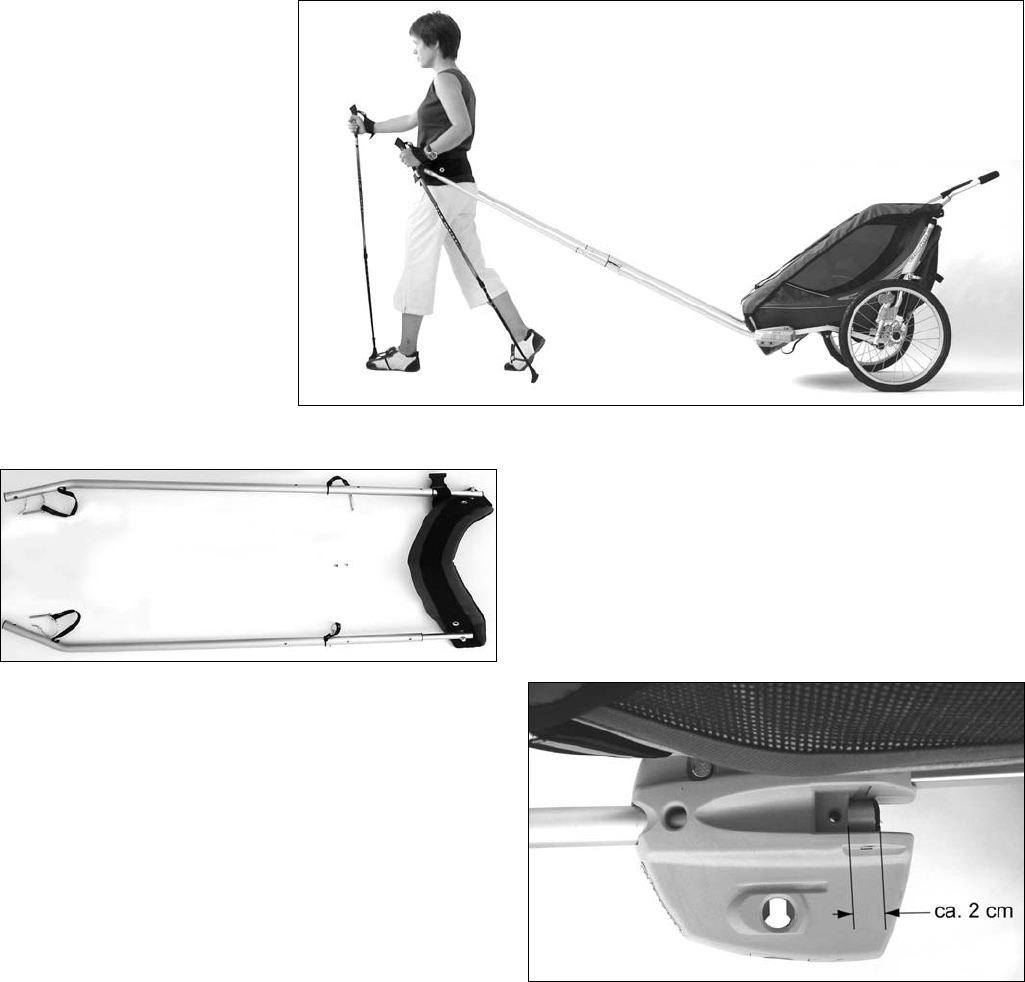
The assembled Walker
(Ready Chassis + Walking Kit)
Supplied as standard
Drawbars with hip strap, additional self-locking nuts
Safety instructions for use as Walker
Please make sure you read the safety instructions in the
“Safety” section at the beginning of this Owner’s Manual.
Before each journey check that all components are properly
fi tted, particularly the wheels and the tow bars.
Always make sure that the security pin of the tow bars
are properly installed, so as to prevent the carrier from
accidentally separating from the bars.
Make sure the length of the tow bars is adjusted correctly,
to ensure that your poles cannot come into contact with the
carrier.
Be mindful of the space needed due to the width and length
of the carrier. Take care in oncoming traffi c on narrow paths!
Please remember that controlling a fully laden walker
requires experience and good physical fi tness.
Particular care is needed on slopes, uneven terrain and
when stopping.
First take the walker for a practice run without children, but
with the maximum load. Perform the practice run on terrain
that is more diffi cult to cover than that which you want to
travel later with children.
•
•
•
•
•
•
•
•
Fitting the drawbars to the carrier
Identical for all models.
Insert each drawbar into the VersaWing 2.0 until the vertical
holes in the arms and VersaWing 2.0 are aligned with each
other. The drawbars should now, at the back in the slot of the
VersaWing 2.0, protrude about 2 cm / 3/4“ over the plastic edge.


