


31
DANGER
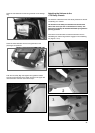
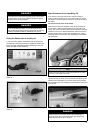
Always attach the hitch’s back-up safety strap in the manner
described above. It serves as additional protection against
losing the carrier during operation.
DANGER
Do not use the Bicycle Trailer if you cannot attach the hitch’s
back-up safety strap around your bicycle frame for any reason!
Contact your specialist retailer for assistance if this occurs.
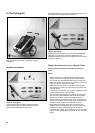
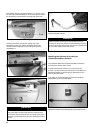
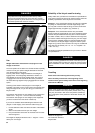
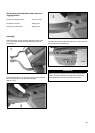
Fixing the Weber hitch to the bicycle
In this connection, please read carefully the comprehensive
manufacturer’s instructions which are supplied by Weber both
for the hitch with adjustable kickstand (Weber B) and for the
Weber Axle-Mount Hitch (Weber E).
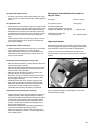
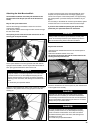
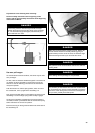
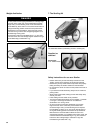
Special features of the VersaWing 2.0
If you want to convert the carrier from a Bicycle Trailer to
another CTS Conversion Kit, or if you want to store the carrier,
the hitcharm on the Cougar and CX can be stored to the side of
the carrier.
For this the carrier must not be folded.
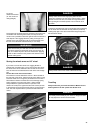
Insert the front end of the hitcharm in the groove provided for
it in the Click ‘n’ Store bracket located on the rear side of the
carrier. The rear end of the hitcharm will point forward. Push the
hitcharm in the Click ‘n’ Store bracket down until the end of the
hitcharm catches in the recess of the VersaWing 2.0, and the
horizontal holes of the hitcharm and VersaWing 2.0 are aligned
with each other.
TIP
Always store the hitcharm on the left-hand side of the carrier
(as seen in the direction of travel).
Use the security pin at the end of the hitcharm for attaching the
hitcharm to the VersaWing 2.0. For this, insert the pin through
the horizontal hole in the VersaWing 2.0 and hitcharm until it will
go no further.
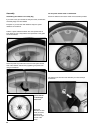
DANGER
Always secure the stored hitcharm to the VersaWing 2.0.
If you do not do this, it could work loose, get caught in the
wheel spokes and cause an accident.
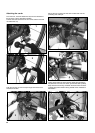
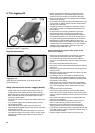
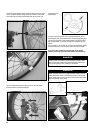
Weber B
Weber E