


21
Case 2: Brakes pull unequally
Basic adjustment
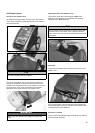
First check that all brake cables with their end caps are properly
located in the relevant hole of the adjusting screws. If necessary
do the same for the adjusting screw on the brake lever (the one
that you are not to adjust). (See illustration in the preceding
section).
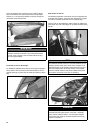
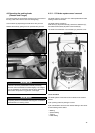
Prop up the carrier so that the wheels turn freely.
Start by adjusting one of the wheels.
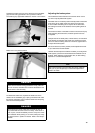
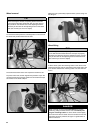
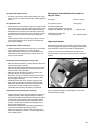
Use a 8 mm wrench to loosen the lock nut of the adjusting
screw G2 on the brake backplate of the drum brake.
Set the wheel turning very slowly.
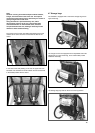
Unscrew the adjusting screw G2 (anti-clockwise) until there
is light braking of the wheel without having to operate the
brake lever.
Screw the adjusting screw G2 back in for one full turn
(clockwise).
Using a 8 mm wrench, tighten the lock nut, but without
moving the adjusting screw.
1.
2.
3.
4.
5.
6.
7.
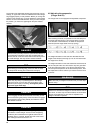
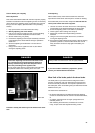
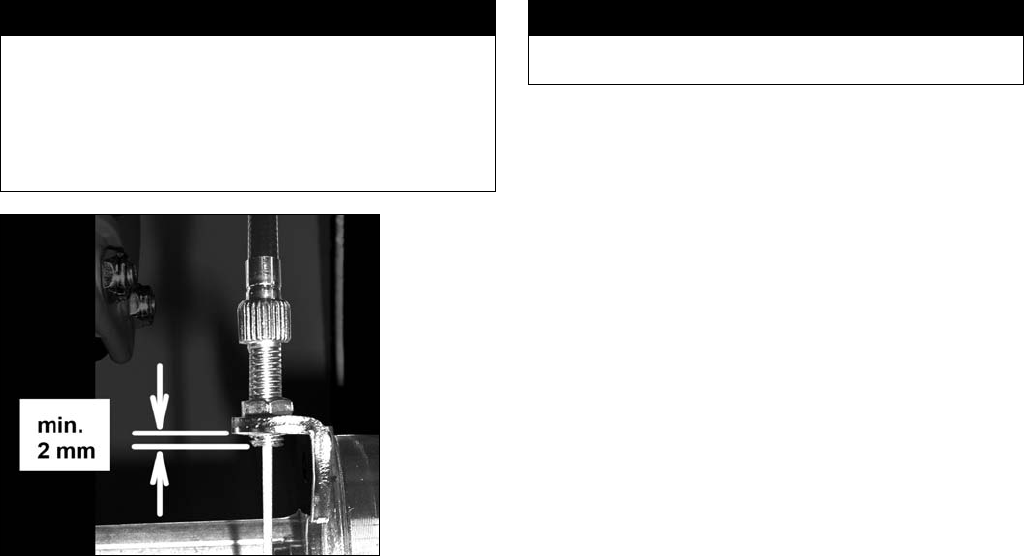
DANGER
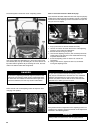
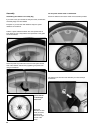
Please note: Adjusting screws G2 and G3 must not be
fully unscrewed from the brake backplate. Make sure
that they extend through the brake backplate with at
least 2 mm protruding on the opposite side.
If this is not the case, there is a risk that the screw will shear
with potential sudden loss of braking force as a result.
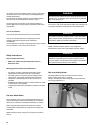
Front view
Proceed in exactly the same way for the wheel on the other
side.
Fine adjusting
With a loaded carrier, check that the breaks now work with
equal force and the carrier does not pull to one side on braking.
If the brakes still pull to one side, readjust on the side that the
carrier pulls to when the brake is applied:
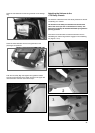
Use a 8 mm wrench to loosen the lock nut of the adjusting
screw G2/G3 on the brake backplate of the drum brake.
Screw the adjusting screw in one half turn (clockwise).
Check again to see if braking force is equal.
Repeat the procedure until equal braking has been
achieved.
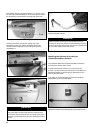
Using a 8 mm wrench, tighten the lock nut, but without
moving the adjusting screw.
Check that the parking brake works properly. With the locking
pushbutton pushed in, check that the carrier does not roll
away and that it comes to a stop again immediately it is
released.
1.
2.
3.
4.
5.
6.
DANGER
Always make sure that the lock nuts are tightly fastened.
If you cannot obtain satisfactory adjustment, please
consult your Authorized Chariot Retailer.
Wear limit of the brake pads in the drum brake
The brake pads on your Chariot CX are designed to have a
long life, but will wear over time. With frequent use their wear
limit can eventually be reached. This requires replacement of
the brake pads, which is something that your Authorized Chariot
Retailer will carry out.
The wear limit is reached when
No further readjustment is possible because the adjusting
screws are unscrewed to their maximum as described above,
or
on release, the brake lever no longer springs back to its
released position, or
after releasing the brake lever, the wheels do not move
freely, in spite of the basic adjustment being correct.
•
•
•