Teledyne API Model 401 O
3
Photometric Calibrator Instruction Manual, 01124, Rev. J2
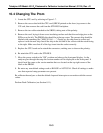
10.4 Changing The Prom
1. Locate the CPU card by referring to Figure 1-7.
2. Remove the screws that hold the CPU card (SBC40 printed on the lever) top corner to the
V/F card, then remove the card from the STD-BUS backplane.
3. Remove the two cables attached to the SBC40, taking note of the polarity.
4. Remove the card, laying it down on an insulating surface such that the card edge pins on the
PCB are on the left. The PROM chip should be at the top center. The current chip should be
labeled with something like "M401 411A0 - - -". Gently pry the chip from its socket and
replace it with the new chip. Install the chip in the left end of the socket with the notch facing
to the right. Make sure that all of the legs insert into the socket correctly.
5. Replace the CPU board and re-attach the connectors, making sure to observe the polarity.
6. Re-attach the CPU card to the STD-BUS.
7. Move the power switch to the "ON" position and observe the front panel display. As the
analyzer goes through the setup the version number will be displayed on the front panel. It
should read the same as the version number that was located on the top right corner of the
label on the PROM.
8. Re-enter any non-default settings such as RANGE or AUTOCAL. Check all settings to make
sure that expected setup parameters are present.
Re-calibrate the analyzer so that the default slope and intercept are overwritten with the correct
values.
Perform Dark Calibration (see Section 8.11).
10-3


