Teledyne API Model 401 O
3
Photometric Calibrator Instruction Manual, 01124, Rev. J2
If these actions all occur, it is probable that the Calibrator's Power Supplies, CPU, and Display
are working properly.
If any of these actions fail to occur, power and/or CPU operation should be checked as follows.
9.2.1 Checking The Power Sub-Systems
1. Check incoming line power for proper Voltage and Frequency.
2. Check the Circuit breaker on the Calibrator's rear panel.
3. Check the 3-wire safety power-input plug on the Calibrator's rear panel.
4. Check for proper internal AC power by confirming that the Red(right-most) LED on the
Power Supply Module is lit. If this LED is not lit, replace the fuse at the bottom center of the
Power Supply Module.
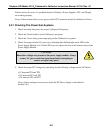
CAUTION
Hazardous voltages are present on the power supply module. Always
remove AC power cord from instrument before attempting to
remove or replace any parts.
5. Check for proper DC Voltages by measuring for the following voltages on the V/F Board:
+5V between TP4 and TP5
+15V between TP1 and TP3
-15V between TP2 and TP3
If any of these voltages are incorrect, check the DC Power Supply as described in
Section 9.6.4.
9-2


