


22
Operating Manual V 1.1 – 01/2010
11
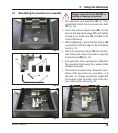
Fig. 26
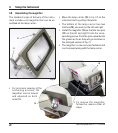
Fig. 27
13
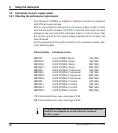
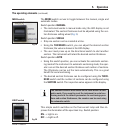
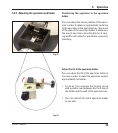
4.8 Assembling the magnifier
4. Setup the Instrument
14
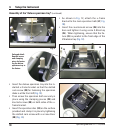
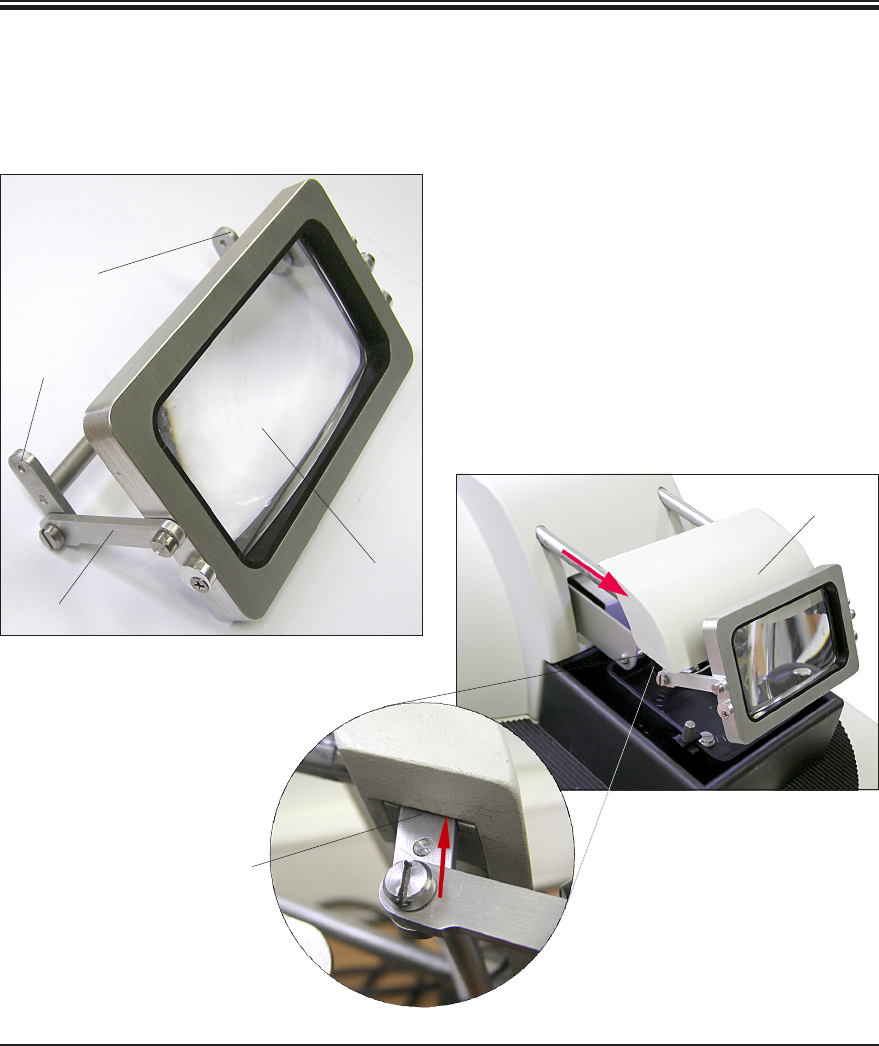
• Movethelampcarrier(10, in Fig. 27) on the
instrument out by pulling it forwards.
• The bottomofthelamp carrier has two
notches (12), one each on the left and right.
• Installthemagnifier(13) so that the two pins
(11) on the left and right fit into the corre-
sponding groove. Push the pins upwards into
the groove as far as they will go as shown in
the enlarged section of Fig. 27.
• Themagnifierisnowsecurelyfastenedand
can be moved along with the lamp carrier.
11
10
• To remove the magnifier,
follow the reverse order of
steps.
The standard scope of delivery of the instru-
ment includes a 2x magnifier that can be as-
sembled on the lamp carrier.
12
• Forprecisionviewingofthe
sectioning process, the
magnifier can be moved
and adjusted on both
arms (14).