


Installation 25
2.
Use the rack template ("Measuring with the rack template" on page 25) to mark the locations for the
rack rails.
3. Install the rack rails ("Installing the rack rails" on page 25) for each enclosure.
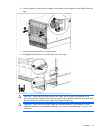
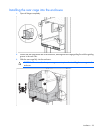
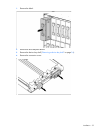
4. Install the enclosure into the rack ("Installing the enclosure into the rack" on page 26).
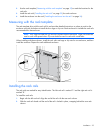
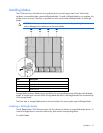
Measuring with the rack template
The rack template ships with the rack rail kit and provides detailed instructions on where to position the
enclosure rack rails and where to install the four cage or clip nuts. Each enclosure kit includes the rack rails
recommended for that enclosure.
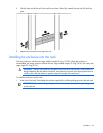
NOTE: Four cage nuts and four clip nuts are included with the enclosure. Cage nuts should be
used in racks with square holes. Clip nuts should be used in racks with round holes.
When installing multiple enclosures, install the rack rails and cage or clip nuts for one enclosure, and then
install the enclosure. Repeat for each additional enclosure.
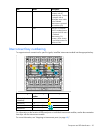
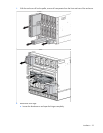
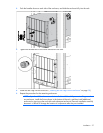
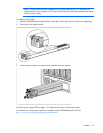
Installing the rack rails
The rack rails are marked for easy identification. The left rack rail is marked "L" and the right rack rail is
marked "R."
To install the rack rails:
1. Begin with the left rack rail. Align the end of the rail with the rear rack column.
2. Slide the rack rail closed until the end of the rail is locked in place, wrapping behind the rear rack
column.