49
Confirming the date
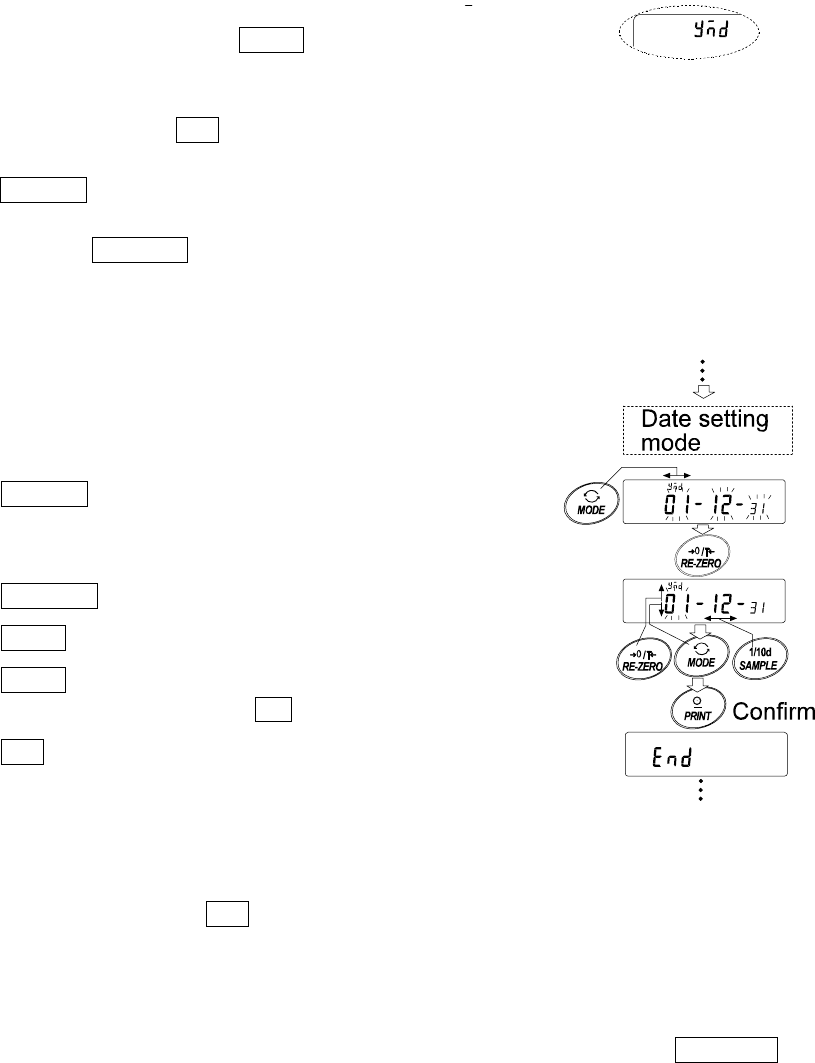
6 The current date is displayed with all the digits
blinking.
To change the display order of year (y), month (n)
and day (d), press the MODE key. The date is
output in the order as specified.
When the date is correct and the operation is to be
finished, press the CAL key and proceed to step 8.
When the time is to be confirmed again, press the
SAMPLE key and go back to step 4.
When the date is not correct and is to be changed,
press the RE-ZERO key and proceed to step 7.
Note
The year is expressed using a two-digit format. For
example, the year 2000 is expressed as “00”.
Setting the date (with part of the digits blinking)
7 Set the date using the following keys.
SAMPLE key To select the digits to change
the value. The selected digits
blink.
RE-ZERO key To increase the value by one.
MODE key To decrease the value by one.
PRINT key To store the new setting,
display end and go to step 8.
CAL key To cancel the new setting and
go to step 8.
Quitting the operation
8 The balance displays the next menu item of the
function table. Press the CAL key to exit the clock and
calendar function and return to the weighing mode.
Notes
Do not enter invalid values such as a non-existing date when setting the time and date.
When the clock backup battery has been depleted, the balance displays rtc pf . Under
this condition, press any key and set the time and date. The dead battery only affects the
clock and calendar function. Even so, the function works normally as long as the AC
adapter is connected to the balance.


