


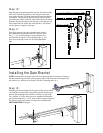


15
Step 10:
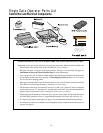
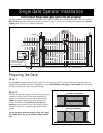
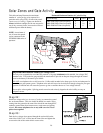
Open the gate to the desired position (at least 10º and no greater
than 110º). Position the operator so that the gate bracket just
rests against the gate. Check the clearance between the operator
and the gate. The operator should only make contact with the
gate at the gate bracket. However, there should not be too much
clearance between the operator and the gate, or the operator will
fully extend before it reaches the closed position. See illustra-
tion at right for examples of clearance.
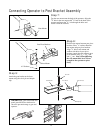
Step 11:
Now align spacer and post pivot brackets hole with the
post bracket hole that provides the best clearance. Insert
the
1
/
2
" x 3
3
/
4
" bolt through holes in post bracket, post
pivot brackets and spacer. When tightening the
1
/
2
" nut,
leave it loose enough so that you can make adjustments
later.
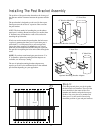
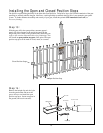
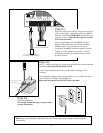
Installing the Gate Bracket
Spacer
Step 12:
With the gate bracket clamped in the open position (no more than
110
o
from the closed position). Detach the operator from the gate
bracket. The mounting holes should be centered over the scribe
line. Drill the
1
/
2
" holes in the gate cross member and attach the
gate bracket using the
1
/
2
" x 2
3
/
4
" bolts, washers and nuts. Reattach
the operator to the gate bracket. You have now established the
OPEN POSITION of the gate.
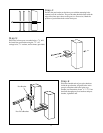
NOTE: Rotating the front mount at the end of the push-pull tube will change its length so
that the mount and gate bracket can be properly aligned with each other on the gate at the
best location (i.e. between or on pickets, on braces, mounting plate, etc.).