3-29
ISS 506 Integration Seamless Switcher • Operation
Selecting an input to be the preview output and switching it to
the program output
N
In this example, the switcher is set to Swap mode. See “Preview Switch Mode
submenu”, earlier in this chapter.
1
. Press and release a preview input button (figure 3-20).
PROGRAM
PREVIEW
LOGO 2
/BLACK
LOGO 1
/BLACK
1
2
3
4
5
6
1
2
3
4
5
6
LOGO 2
/BLACK
LOGO 1
/BLACK
FREEZE
FREEZE
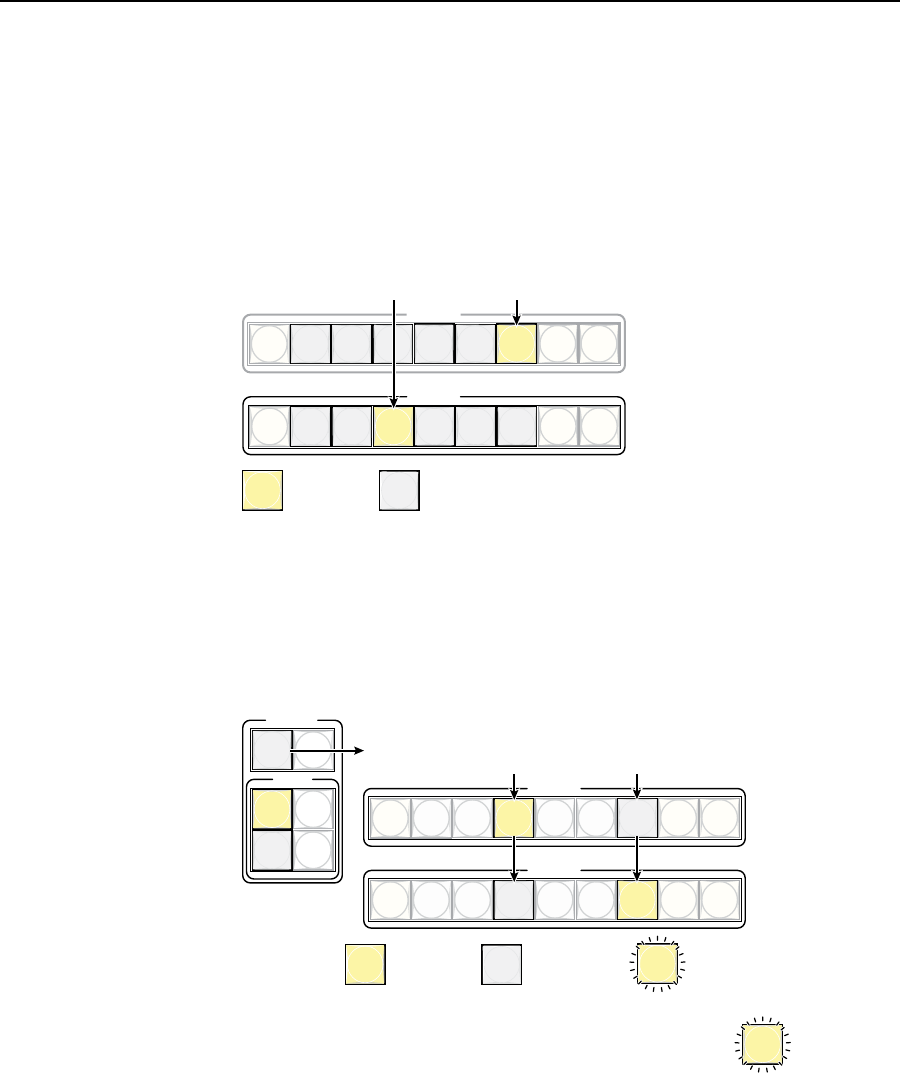
Press and release the Preview 3 button.
The Preview 3 button lights to indicate that input 3 is selected and
the video is scaled and output as the preview output.
N The Program 6 button indicates that input 6 is selected
as the program output.
= Lit button = Unlit button
Figure 3-20 — Selecting an input
2. Press and release either the Cut or Take button.
Cut button — The ISS immediately switches the input selected as the preview
output to the program output and the input selected as the program output to
the preview output (figure 3-21). No switching effects are added.
PREVIEW
1
2
3
4
5
6
LOGO 2
/BLACK
LOGO 1
/BLACK
FREEZE
PROGRAM
1
2
3
4
5
6
LOGO 2
/BLACK
LOGO 1
/BLACK
FREEZE
TRANSITION
EFFECTS
CUT
TAKE
PIP
TITLE
WIPE
DISSOLVE
TAKE
Press and release the Cut button. Cut flashes once.
If the Wipe or Dissolve effect is selected (lit):
The Preview 3 button goes out and the Program 3 button lights.
The Program 6 button goes out and the Preview 6 button lights.
If the PIP or Title effect is selected (lit):
The Preview 3 button and the Program 6 button remain lit.
The Ta ke button blinks until you press Cut or Take to
turn off the PIP or title effect.
= Blinking button
= Lit button = Unlit button
Figure 3-21 — Cutting to the selected input in Swap mode


