


6-6
S
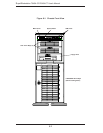
uperWorkstation 7045A-C3/7045A-CT User's Manual
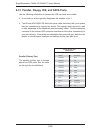
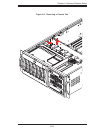
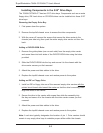
Installing/Removing SAS/SATA Drives
The SAS/SATA drive carriers are all easily accessible at the front of the chassis.
These drives are hot-swappable, meaning they can be removed and installed with-
out powering down the system.
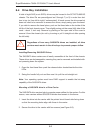
Open the front bezel then push the release button located beside the drive
LEDs.
Swing the handle fully out and then use it to pull the unit straight out.
Note: Your operating system must have RAID support to enable the hot-swap
capability of the SAS/SATA drives.
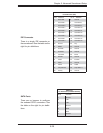
Mounting a SAS/SATA drive in a Drive Carrier
The SAS/SATA drive carriers help to promote proper airfl ow for the system. For this
reason, even carriers without SAS/SATA drives must remain in the server.
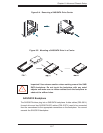
Insert the drive into the carrier with the printed circuit board side facing down
so that the mounting holes align with those in the carrier.
Secure the drive to the carrier with four screws (see Figure 6-5).
1.
2.
1.
2.
6-4 Drive Bay Installation
A total of eight SAS (or six SATA) drives may be housed in the SC743TQ-865-SQ
chassis. The drive IDs are preconfi gured as 0 through 7 (or 5) in order from bot-
tom to top (or from left to right if rackmounted). A bezel covers the drive area but
does not need to be removed to access the drives; simply swing open the bezel.
If you wish to remove the bezel piece, push on the three tabs on the inside of the
left lip of the front chassis cover. Then slightly swing out the same (left) side of the
cover - about ½ inch only. Remove by pushing on the open side of the cover to
remove it from the chassis (do not try to swing or pull it straight out after opening
the left side).
Regardless of how many SAS/SATA drives are installed, all drive
carriers must remain in the drive bays to promote proper airfl ow.
!