


OPERATIONAL INSTRUCTIONS
16
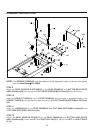
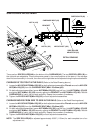
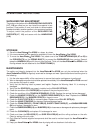
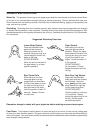
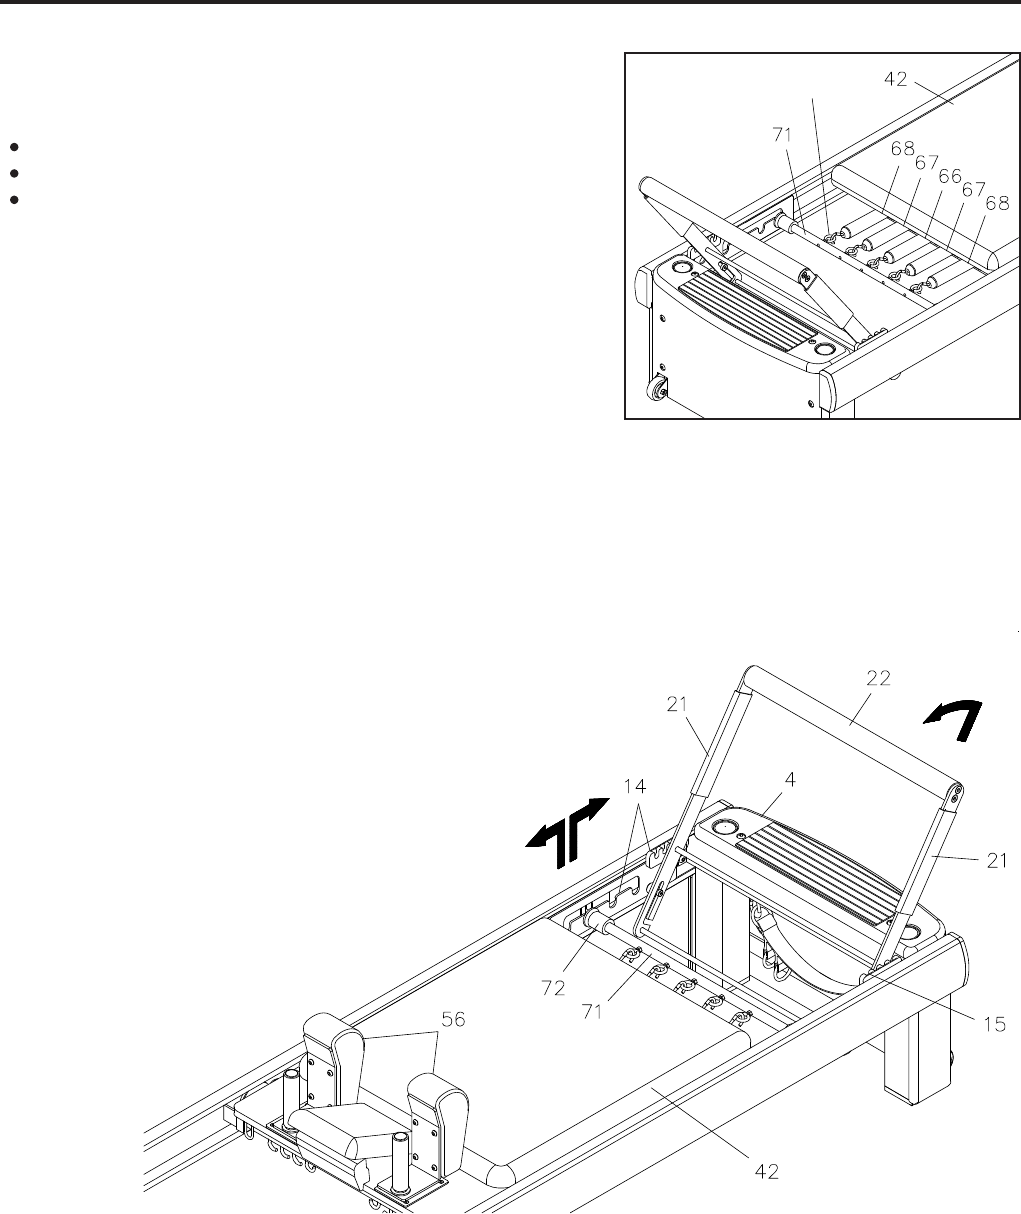
LOAD ADJUSTMENT
There are three different tension levels for the springs.
Eyehooks(70)
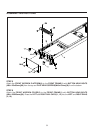
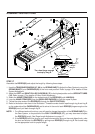
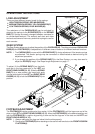
GEAR SYSTEM
The Gear System allows you to adjust the position of the CARRIAGE(42). The distance between SHOULDER
PADS(56) and FOOTBAR(22) is adjustable to fit different sizes of users or for different workout functions.
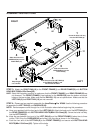
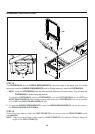
FOOTBAR ADJUSTMENT
The FOOTBAR(22) can be positioned at four angles. Lift the FOOTBAR(22) until the lugs come out of the
slots on the LEFT and RIGHT GEAR GUIDES(14, 15). Move the FOOTBAR(22) to the desired position and
lock the FOOTBAR(22) in position by pushing it down so that the lugs are in the slots on the LEFT and
RIGHT GEAR GUIDES(14, 15).
NOTE:
Always make sure the lugs are locked into the slots properly.
Remove the FOOTBAR(22) when standing on the cushion with one foot on the FRONT WOODEN
PLATFORM(4).
1.
2.
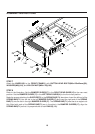
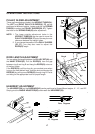
To adjust, lift the SPRING BAR(71) so that both
ends are in the long upper slot in the LEFT and
RIGHT GEAR GUIDES(14, 15). Slide the SPRING
BAR(71) to a new position and insert both ends
into the vertical slots in the LEFT and RIGHT GEAR
GUIDES(14, 15) to lock the SPRING BAR(71) into
position.
NOTE: The CARRIAGE(42) moves with the SPRING BAR(71) during adjustment if the tension springs
are attached. The tension springs may be connected or disconnected as desired during the
adjustment procedure.
If you change the position of the SPRING BAR(71) in the Gear System, you may also need to
adjust the ROPE(63) length. See Rope Length Adjustment on page 17.
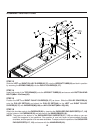
The resistance of the CARRIAGE(42) can be adjusted by
attaching the springs to the EYEHOOKS(70) on the SPRING
BAR(71). Springs are easily changed between exercises for
an uninterrupted workout. The workout wall chart and video
workouts recommend how many and which springs to use for
each exercise.
HIGH TENSION SPRING, RED MARKED(66)
MEDIUM TENSION SPRING, YELLOW MARKED(67)
LOW TENSION SPRING, BLUE MARKED(68)
1.
2.