18
Servicing
Wartung Entretien
Servicio
Manutenzione Underhåll
● Trouver La Faute ● Ricerca Guasti ●
Felsökning
● Localizacion De Averias● Fault Finding ● Fehlersuche
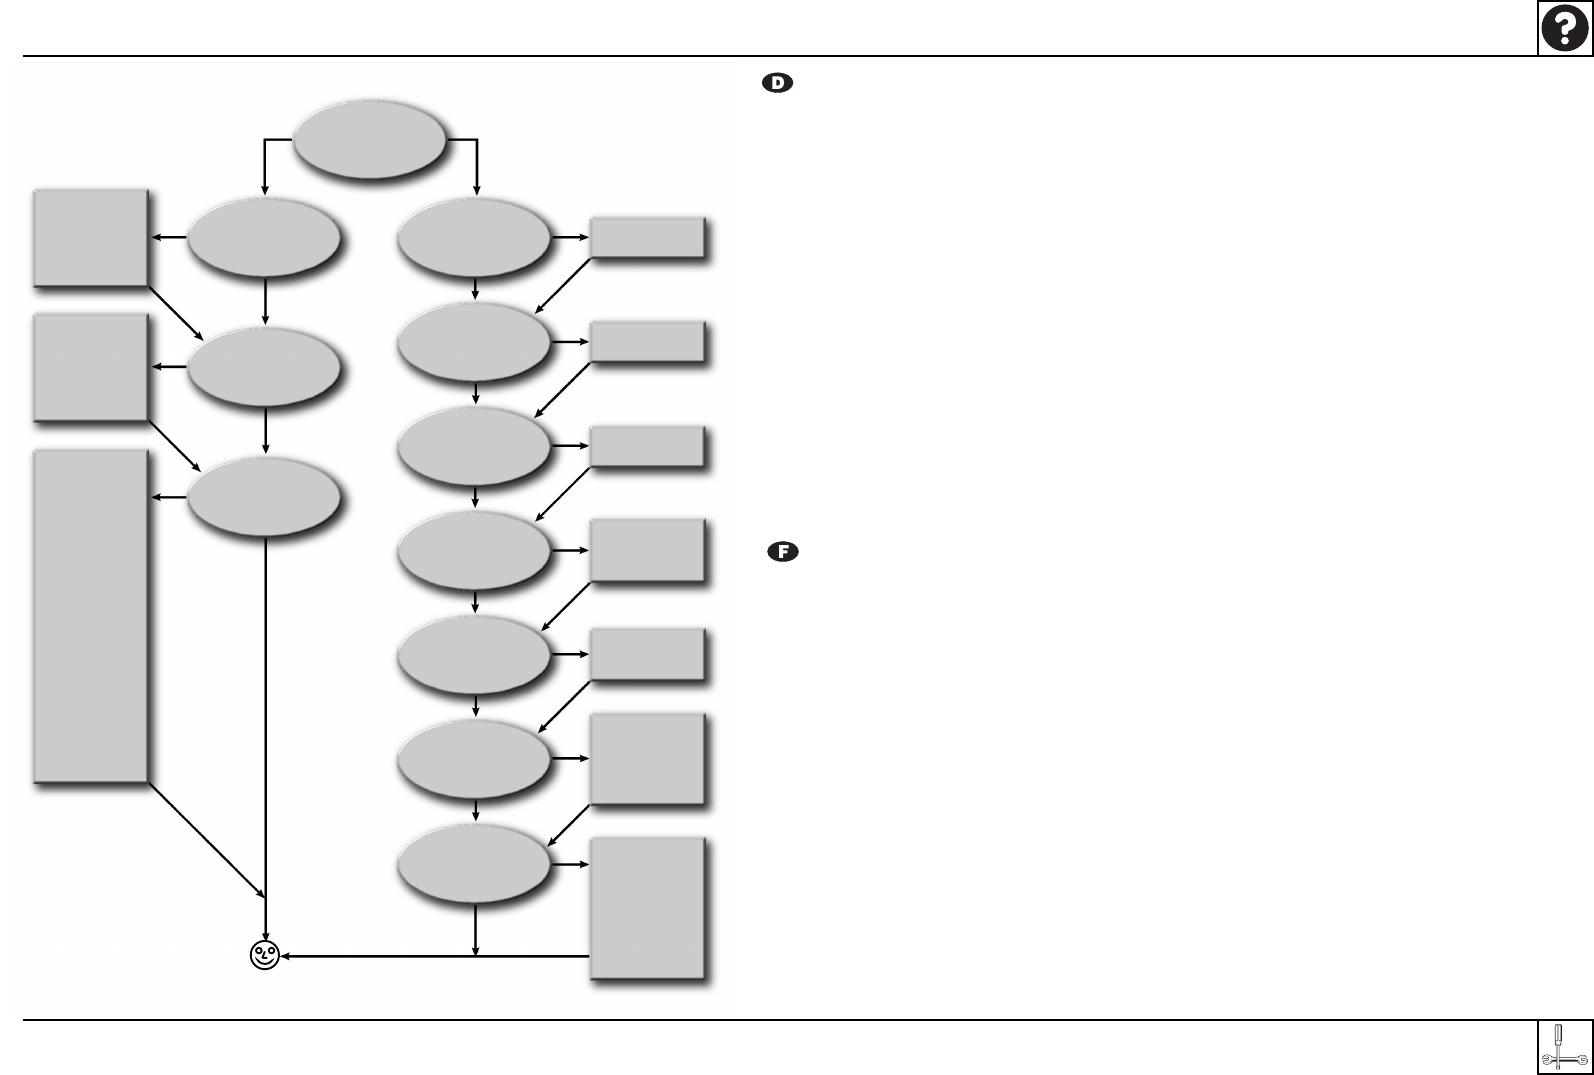
Q1 Funktioniert der Windenmotor?
Q2 Dreht sich die Kettennuss?
Q3 Sicherheitsschalter an? (Wenn montiert)
Q4 Korrekte Drehrichtung bei Betätigung des Aufhol- und Ablass-Tasters.
Q5 Sicherung drin?
Q6 Zieht die Ankerwinde genügend Last?
Q7 Überprüfen Sie die 3 Amp. Sicherung des Schalters (Wenn montiert)
Q8 Schalteranschlüsse korrekt montiert?
Q9 Batterieladung ausreichend?
Q10 Strom am Windenmotor?
Q11 Spannungsabfall mehr als 2V innerhalb der Installation?
A1 Überprüfen Sie, ob die Paßfeder und der Sprengring auf der Welle montiert sind.
Überprüfen Sie, ob die Kettennuss angezogen ist
A2 Schalter an
A3 Überprüfen Sie, ob die Installation der Schalterkabel wie im Handbuch durchgeführt ist.
Überprüfen Sie die Motoranschlüsse F1 & F2
A4 Zurückschalten
A5 Stellen Sie sicher, dass die Kabelgrößen den Empfehlungen des Installationshandbuchs entsprechen, da die Windenleistung unmittelbar von der
Kabelgröße und –länge abhängt.
Die Leistung der Winde ist unmittelbar abhängig von der Kabellänge und –größe.
A6 Auswechseln.
A7 Überprüfen Sie den Schaltplan gemäß Montage - Anleitung.
A8 Service - Batterie laden
A9 Reinigen und Anziehen der Anschlüsse
Überprüfen Sie den Schaltplan gemäß Montage - Anleitung
A10 Überprüfen Sie, ob die Kabelgröße der im Handbuch empfohlenen Größe entspricht. Die Windenleistung ist unmittelbar von der Kabellänge und –
größe abhängig.
Q1 Le moteur du cabestan fonctionne-t-il ?
Q2 Le barbotin tourne-t-il ?
Q3 Le coupe-circuit (si installé) est-il fermé ?
Q4 Le sens de rotation correspond-il à la montée et à la descente ?
Q5 Le disjoncteur est-il enclenché ?
Q6 Le cabestan tire-t-il une charge suffisante ?
Q7 Le fusible 3 amps du coupe-circuit (si installé) est-il intact ?
Q8 Les raccords au bouton sont-ils corrects ?
Q9 Le niveau de charge des batteries est-il bon ?
Q10 Le courant arrive-t-il au moteur du cabestan ?
Q11 La perte de voltage dans l’installation est-elle supérieure à 2V ?
A1 Vérifier que la clavette d’entraînement et le circlip sont bien ajustés à l’arbre.
Vérifier que l’écrou supérieur est bien serré.
A2 Le fermer.
A3 Vérifier le cablage des boutons avec le manuel d’installation.
Vérifier les connexions aux bornes moteur F1 & F2.
A4 L’enclencher.
A5 Vérifier la charge des batteries.
Vérifiez que le diamètre des câbles est conforme aux recommandations du manuel d’installation, la performance du cabestan est directement liée au
diamètre et à la longueur des câbles.
Vérifiez que l’embase du cabestan et le moteur de transmission sont parallèles au pont.
A6 Le changer.
A7 Vérifier le plan d’installation sur le manuel.
A8 Recharger.
A9 Nettoyer & resserrer les contacts.
Vérifier le plan d’installation sur le manuel.
A10 Vérifier que le diamètre des câbles est tel que recommandé dans le manuel d’installation. (La performance du cabestan est directement liée au
diamètre et à la longueur des câble).
Q2
Does the Drum rotate?
Q1
Does the capstan
motor operate?
Q3
Safety switch on?
(If fitted)
A1
Check drive key &
circlip are fitted to
shaft
Check top nut
is tight
A2
Switch on
Q5
Circuit breaker reset?
A4
Reset
Q7
Check 3 Amp switch
protection fuse OK
(If fitted)
A6
Change
Q8
Switch connections correctly
fitted?
A7
Check wiring diagram
in the installation
manual
Q9
Battery power OK?
A8
Service
Charge battery
Q10
Power at capstan motor?
A9
Clean and tighten
connections
Check wiring diagram
in installation manual
Q11
Voltage drop more than 2V
across the installation?
A10
Check cable sizes are
as recommended in
the installation
manual, capstan
performance is directly
related to cable size
and length
Q4
Correct rotation when switch
up or down pressed?
A3
Check switch wiring as
per installation manual
Check motor
connections
F1 & F2
Q6
Does capstan pull sufficient
load?
A5
Check battery power
Check cable sizes are
as recommended in
the installation
manual, capstan
performance is directly
related to cable size &
length
Check that the
voltage drop is no
more than 2V over the
entire installation
Check capstan base &
motor gearbox are
parallel to the deck
✘
✓
✘
✘
✘
✘
✘
✘
✘
✘
✘
✘
✓
✓
✓
✓
✓
✓
✓
✓
✓
✓


