


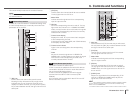


21
TF series Quick Guide
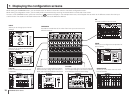
Setup
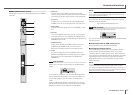
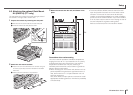
8-3 Attaching the optional Rack Mount
Kit (RK5014) (TF1 only)
The procedure is the same for the left and right sides of
the console. The right side is shown here.
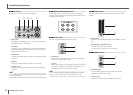
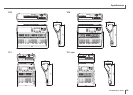
1 Prepare the console by removing the side pads.
1 Remove the two screws that secure each side pad.
2 Slide and remove the side pads as shown.
❷
❶
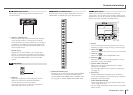
2 Attach the rack mount brackets.
1 Attach the rack mount brackets to the console using the
8 screws (4 per side) that were included with the Rack
Mount Kit.
2 Make sure each bracket is fi rmly attached.
3 Mount the console into the rack, and fasten it into
place.
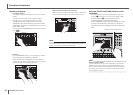
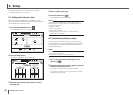
Precautions when rackmounting
This unit is rated for operation at ambient temperatures
ranging from 0 to 40 °C. If you install this unit in a poorly
ventilated rack along with other devices, the ambient
temperature inside the rack may rise, resulting in
inefficient performance. Be sure to follow the guidelines
below to prevent overheating.
•When mounting this unit in a rack with devices such as
power amplifiers that generate a significant amount of
heat, leave more than 1 U of space between this unit
and other equipment.
Also, either leave the open spaces uncovered or install
appropriate ventilating panels to minimize the possibility
of heat buildup.
•Toensuresufcientairow,leavetherearoftherack
open and position it at least 10 cm from walls or other
surfaces. If the rear of the rack cannot be left open,
install a commercially available fan or similar ventilation
producttosecuresufcientairow.Ifyouhaveinstalled
a fan kit, there may be cases in which closing the rear of
the rack will produce a greater cooling effect.
Refer to the rack and/or fan unit manual for details.
14U
16U