


17
TF series Quick Guide
Controls and functions
6-
12
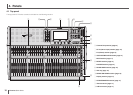
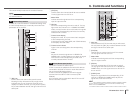
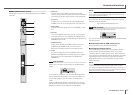
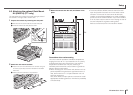
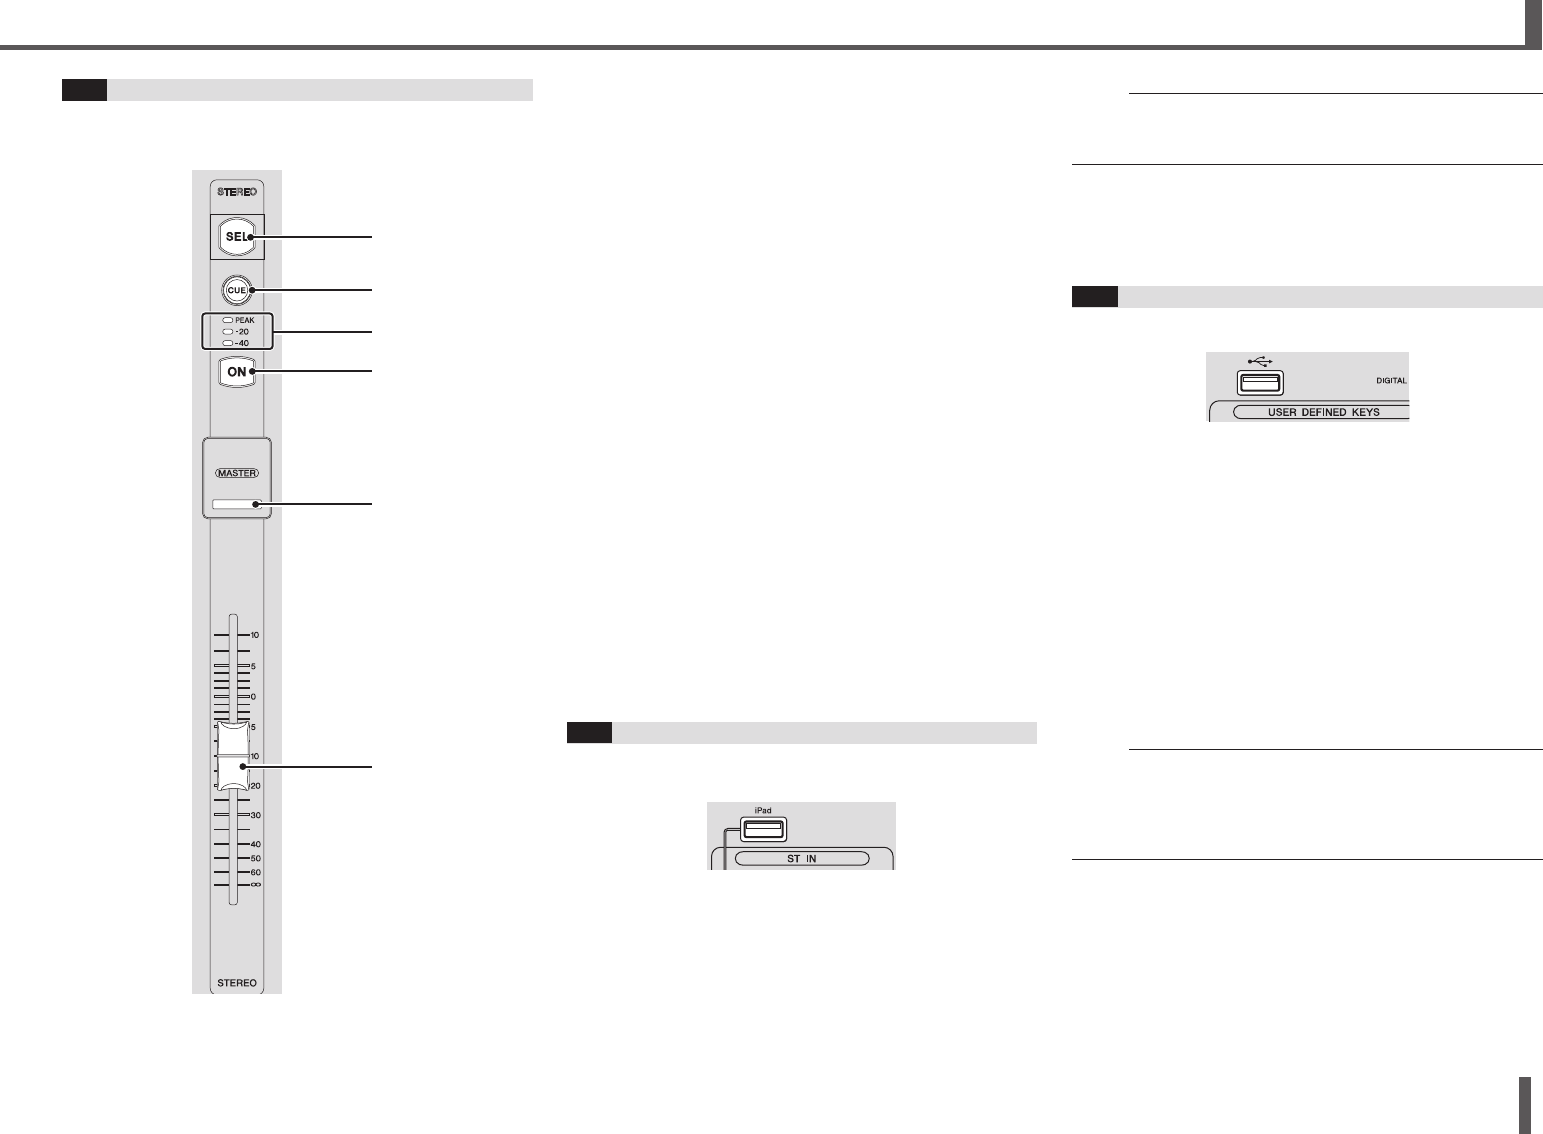
STEREO/MASTER section
Allows you to control the main parameters of the STEREO
channel.
①
②
④
⑤
⑥
③
1 [SEL] key
Used to select the STEREO channel that you will
control. You can press the [SEL] key to switch between
controlling the left and right channel of the stereo pair.
2 [CUE] key
Used as the cue monitor key for the corresponding
STEREO channel. The key lights when the CUE is on.
3 Meter LEDs
Indicate the audio signal level of the STEREO or CUE
bus.
4 [ON] key
Turns the STEREO channel on and off. The key lights
when the channel is on. In SENDS ON FADER mode,
the [ON] key turns the bus selected by the SENDS ON
FADER key on and off.
5 [MASTER] LED
Lights when SENDS ON FADER mode is turned on.
In SENDS ON FADER mode, the entire section
becomes the master section for the selected bus.
6 Fader
Adjusts the output level of the STEREO channel.
In
SENDS ON FADER mode,
the fader adjusts the signal
level sent to the bus selected by the SENDS ON
FADER key.
6-
13
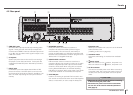
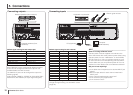
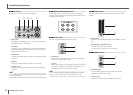
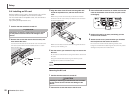
iPad connector
Allows you to connect an iOS device or a USB storage
device.
To connect an iOS device, use the dedicated cable that
was included with the device. This connector allows you
to use audio files on your iOS device as background
music.
When a USB storage device is connected, you can use
the device to play audio files or record the mixer’s output
directly and save it as an audio file (format: WAV).
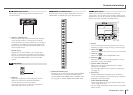
NOTE
When using a USB storage device for recording, use a hard disk
drive or other high-speed device. (USB memory drives are not
guaranteed to function properly.)
For information about compatible iOS devices, visit the
Yamaha pro audio website.
http://www.yamahaproaudio.com/
6-
14
USB connector
Used for connecting USB memory drives.
You can connect a USB memory drive and read/write data
from/to the drive.
Supported formats for USB memory drives
Drives formatted using FAT32 are supported.
Preventing accidental erasure
Some USB memory drives offer a write-protect feature
which prevents accidental data erasure. If you save
important data on a USB memory drive, we recommend
using the drive’s write-protect feature to protect your data
from being erased. Conversely, make sure the drive’s
write-protect feature is turned off before trying to save
data to the drive.
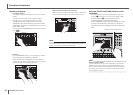
NOTE
The ACCESS indicator is displayed in the upper right of the
screen while data is being accessed (read, written, erased,
etc.). While this indicator is displayed, do not turn off the unit or
disconnect the USB memory drive. The unit, the drive, and data
stored on the drive could become damaged.